DIY project from NZ Gardener magazine
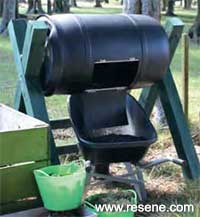
If you want a faster composting bin you might give this clever rotating bin a whirl.
You will need: a 200-litre plastic drum, four 100mm x 100mm x 1.8m H4 treated posts for the legs, two 1200mm lengths of 100 x 25 treated pine for cross braces, a skilsaw or handsaw, chisel, 10mm & 25mm paddle bits, 4mm drill bit, two M10 x 120mm coach bolts, Jigsaw and blades, two 64mm hinges, screwdriver, small bolts and nuts, rivets and rivet gun, offcuts of 7mm ply or similar, two 50mm barrel bolts, plastic downpipe or aluminium for internal fin, one 25mm x 2m aluminium tube and a hammer.
Cost: $120, excluding drum and stain.
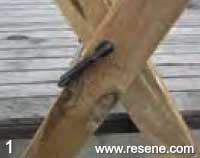 Step 1
 Step 2
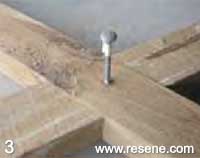 Step 3
 Step 4
 Step 5
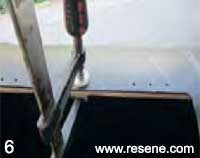 Step 6
 Step 7
Toss in a mixture of garden waste and kitchen scraps. Chop or shred the material as smaller pieces break down more quickly. Don't overfill. If the drum is too heavy it won't turn easily. Spin 4-5 times daily to mix and aerate. The contents will heat up which aids decomposition and kills weed seeds.
![]() Get inspired ! Subscribe
Get inspired ! Subscribe ![]() Get saving ! Apply for a DIY card
Get saving ! Apply for a DIY card
![]()
Can't find what you're looking for? Ask us!
Company profile | Terms | Privacy policy | Quality and environmental policy | Health and safety policy
Colours shown on this website are a representation only. Please refer to the actual paint or product sample. Resene colour charts, testpots and samples are available for ordering online. See measurements/conversions for more details on how electronic colour values are achieved.
What's new | Specifiers | Painters | DIYers | Artists | Kids | Sitemap | Home | TOP ⇧