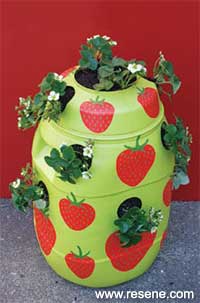
Mark Rayner has a nifty watering device for your strawberry planter and adds a decorative touch.
You will need: A plastic strawberry planter sandpaper, paint brushes, including artists' brush, 12 strawberry plants, a length of cardboard tube – at least 40mm in diameter, a length of thick dowel (a broom handle will do), large nail or punch, hammer and good quality potting mix. Resene Smooth Surface Sealer, Resene Lumbersider tinted to the following colours: Resene Limelight, Resene Red Hot and a testpot of Resene Green Leaf.
To get the look: Mark painted the background wall with Resene Lumbersider tinted to Resene Pohutukawa.
Top tip: Inserting a tube running down its centre makes watering the planter much easier and ensures even distribution of water.
![]()
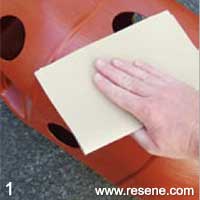
Step 1
Lightly sand the entire outside wall of the planter to provide a 'key' so paint will adhere to the surface.
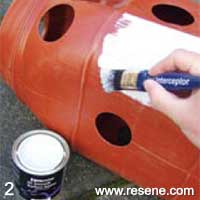
Step 2
Apply one coat of Resene Waterborne Smooth Surface Sealer to the planter and allow to dry for two hours.
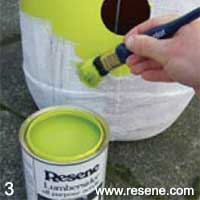
Step 3
Apply two coats of Resene Limelight to the planter, allowing two hours for each coat to dry.
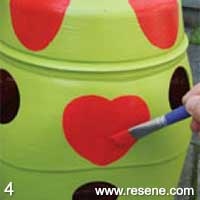
Step 4
Paint strawberry shapes of different sizes on the planter using Resene Red Hot. Once dry, apply a second coat of Resene Red Hot. Allow the paint to dry for two hours.
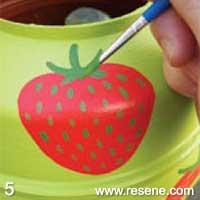
Step 5
Paint the calyx and seeds of each strawberry with two coats of Resene Green Leaf and allow two hours for each coat to dry.
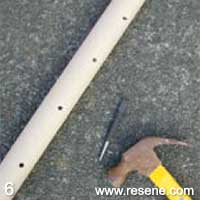
Step 6
Use a nail or hole punch and hammer to make holes down the side of the cardboard tube, as shown.
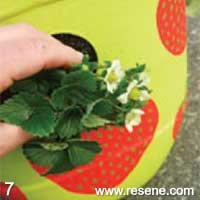
Step 7
Fill the base of the planter with potting mix up to the lowest row of holes and plant the first row of strawberry plants, feeding each plant back through the hole so as not to damage the roots.
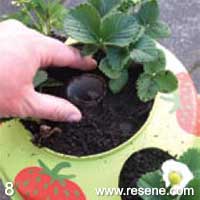
Step 8
Continue thus until all plants are in position. Using the length of dowel, carefully make a hole in the potting mix right down the centre of the planter. Carefully remove dowel. Insert cardboard tube.
![]() Get inspired ! Subscribe
Get inspired ! Subscribe ![]() Get saving ! Apply for a DIY card
Get saving ! Apply for a DIY card
![]()
Can't find what you're looking for? Ask us!
Company profile | Terms | Privacy policy | Quality and environmental policy | Health and safety policy
Colours shown on this website are a representation only. Please refer to the actual paint or product sample. Resene colour charts, testpots and samples are available for ordering online. See measurements/conversions for more details on how electronic colour values are achieved.
What's new | Specifiers | Painters | DIYers | Artists | Kids | Sitemap | Home | TOP ⇧