Rollers are the ideal way to paint a large area quickly and get a professional result. Painting with a roller is fast and easy.
Always use good, well cleaned equipment. Good quality rollers hold more paint and give a better finish than inexpensive rollers. If you are unsure as to whether you are using the right roller, check the information on the Resene roller stand or ask staff at your local Resene ColorShop or Reseller - they can recommend the best roller for the paint you are using and the surface you are painting.
There are many different types of roller sleeves available. Resene and PAL (Paint Aids Ltd) have worked together to match rollers to specific Resene products and areas of use. A unique numbering system and in-store guides are designed to make it easier for you to select the right roller sleeve.
The most popular DIY roller sleeves are available in three sizes. The larger 230mm is the most popular and is used for larger areas, including most walls and ceilings.
The 150mm sleeve can also be used on walls and ceilings but is most suited to smaller surfaces, such as interior doors and cupboards, as well as fencing.
The 100mm long reach rollers are made using the same fabric but do not hold as much paint as the other sleeves as they have a reduced total surface area. They are designed for cupboards, doors and hard to reach areas, such as inside cupboards and shelving.

Be prepared! Have everything you need ready before you start applying paint. Work steadily. Don’t rush and don’t roll fast with a loaded roller - unless you want to be a spray painter!
Rinse new rollers in water (for waterborne paints) or turps (for solventborne paints) to remove any loose fibres or dust before use. If your roller handle has been used before, place a drop of oil on the roller handle bearings (i.e. the two plastic end caps) - it will make painting much easier.
When using waterborne paints, lightly dampen the roller sleeve before use. Ensure excess water is removed. It should be slightly damp rather than wet to touch.
Make sure your roller tray is clean. Tip the paint into the tray to the paint level shown. If you overfill the tray, loading the roller is more difficult and spillages are more likely. Once you’ve got the right amount of paint in the tray, roll the roller into the paint to saturate all the fabric.
Use the ribbed section of the paint tray to squeeze out the excess paint and ensure your roller gets an equal distribution of paint. Repeat this process several times to ‘work’ the paint into the roller. This will make application easier and more consistent.
When painting walls and ceilings, we recommend the use of a quality extension handle. The more painting you have planned (including future projects) or the larger your current project, the better the extension handle you should select.
A simple wooden handle will suffice for a small one-off project, however a quality extension handle such as the Unipro 1.2m pole, will help you achieve a faster and more professional finish.
Rollers are used to paint many substrates from interior walls and ceilings through to panel doors, shelving and kitchen cupboards. They are used to apply waterproof coatings to concrete and planters and for staining and fences.
Painting an interior wall is the most common painting project for DIY painters and the following has been taken from the project sheet for applying Resene SpaceCote. Other project sheets and videos for painting ceilings and exterior plaster are available free online at www.resene.com/videos.
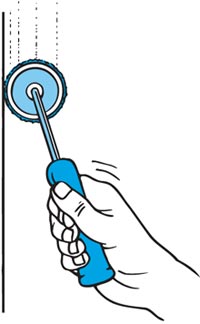
Laying-off: Let the weight of the roller run down the wall
Paint the edges using a brush you are comfortable with – we recommend the 50mm Legend cutting-in brush. Paint 40mm to 50mm out from the edges.
As a rule the more confident and experienced you are the bigger the brush you could select. Bigger brushes hold more paint and are quicker.
Now load the brush with paint. Hold the brush well down the handle as this gives better control.
Wipe the leading edge of the brush for more accuracy.
Cut-in one wall at a time – painting all edges, corners and around light switches etc.
Start with the corner and bring the line of the paint out from it to make rolling easier.
You can work either left to right or vice versa – depending on what is more comfortable. Begin each brushstroke about 100mm along from the end of the previous section, slightly away from the edge itself and work the paint back towards the paint’s wet edge and then back along the edge.
Once you have finished cutting-in, roll the excess paint off the roller and attach the extension handle. The extension handle can make the job much easier.
With the roller loaded with paint lay it carefully against the wall.
Roll in an upwards direction first, moving across the wall area in a rough ‘W’ pattern.
Aim to complete one square metre with each roller load, spreading the paint as evenly as possible.
If you use a 230mm roller sleeve more area will be covered with each roller load than if the smaller 150mm roller is used.
Invert the roller and run it as close to the leading edge of the skirting board and corners as practical.
Once you have covered approximately four square metres you will need to lay-off the painted area to achieve an even consistent finish.
To lay-off first ensure the roller sleeve is not fully loaded with paint. Using only light pressure, lay the roller approx 300 millimetres above the skirting board, now slowly roll up towards the scotia – getting as close as practical to it.
Lightly roll back towards the skirting board but pull the roller away from the wall about 200mm above the skirting board.
Repeat the process overlapping the area just completed by approx quarter to a half of the roller length.
Reload your roller and move onto the next section of the wall repeating the earlier steps.
Adjust the roller angle to get as close as practical to the edges of corners and around door and window frames.
Allow a minimum of two hours to dry and apply a second coat.
Ensure the room has good ventilation and warmth to ensure the paint cures well.
Follow steps as for walls, finishing off along the line of light from windows. View the Resene how to video and project sheet on painting ceilings at www.resene.com/videos.
If you wish to take a break, make sure you stop painting at a natural break in the wall or ceiling, such as a corner. Submerge the roller head in the paint that is in your roller tray, then put a plastic bag around the entire roller tray and seal it. This will keep your roller wet ready for painting when you have finished your break, and it will save you unnecessarily washing your roller.
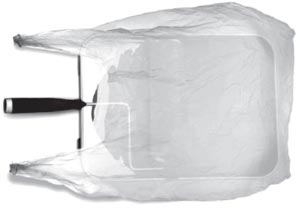
Wrap roller and tray in plastic bag and seal
Wash rollers and trays immediately after you’ve finished painting. When the job is finished roll out as much excess paint from the sleeve as possible and immerse in a bucket of water working through the pile with your fingers. Repeat this process in successive buckets of water until clean and dry the sleeve naturally. Dispose of the soiled water in the garden, not the drain. You would normally discard foam sleeves after applying solventborne paints as they are time consuming and expensive to clean.
Once clean, store roller sleeves upright to avoid flattening the pile.
Resene paint labels carry full instructions on surface preparation and advice on paint application. Please read these instructions carefully before commencing work. Always stir the paint thoroughly before use. Contact your local Resene ColorShop or Reseller if you need further advice.
Use on:
Features:
Recommended for:
Use on:
Features:
Recommended for:
Use on:
Features:
Recommended for:
We recommend an extension pole and a large capacity ribbed tray for this work. The ribbed section lifts the roller pile each time you load.
Use on:
Features:
Recommended for:
Use on:
Features:
Recommended for:
These smaller 100mm rollers and handles are recommended for smaller jobs which are difficult to access. They are available in a range of sleeves (as shown below) and are suitable for work similar to those rollers whose reference numbers are shown alongside.
| Easy Reacher Sleeve | Suitable for similar work as |
| Dacron | Roller No 1 |
| Fabric | Roller No 2 |
| Velvet | Roller No 1 |
| Foam | Roller No 6 |
![]() Get inspired ! Subscribe
Get inspired ! Subscribe ![]() Get saving ! Apply for a DIY card
Get saving ! Apply for a DIY card
![]()
Can't find what you're looking for? Ask us!
Company profile | Terms | Privacy policy | Quality and environmental policy | Health and safety policy
Colours shown on this website are a representation only. Please refer to the actual paint or product sample. Resene colour charts, testpots and samples are available for ordering online. See measurements/conversions for more details on how electronic colour values are achieved.
What's new | Specifiers | Painters | DIYers | Artists | Kids | Sitemap | Home | TOP ⇧