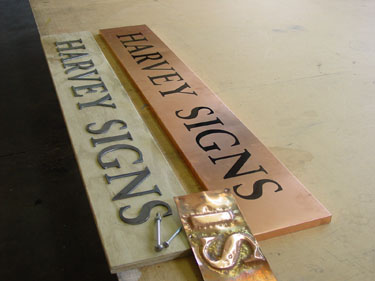
Embossed copper signHere’s the finish up on our embossed copper sign you have seen snippets of in previous months. This sign has exceeded my expectations on how it would turn out. Anyway, here’s our base sign ready to get going and set it up for “beating”.
The copper tray was folded for us to the same size and depth as the treated plywood base panel. We had 3mm steel letters plasma cut by a local engineering firm (about $35.00) which we glued onto the plywood via a reverse weeded vinyl jig (not shown here). We used good old “No More Nails” for this. The black vinyl lettering shown on the copper is a temporary jig just to show us where the steel letters are underneath so we don’t hammer the copper in the wrong place. This was removed when we had finished beating the copper. The small copper sample shown was our first practise attempt and we learnt that ACM lettering was too soft on the edges and didn’t give a nice crisp “stamped edge” effect, hence the use of the steel letters. Once we sat the copper tray over the ply / steel letters we nailed the perimeter edging with copper nails to hold our tray in place. The two carriage bolts shown are what we used to beat the copper. The rounded heads work fine. The two sizes were ideal for this job.
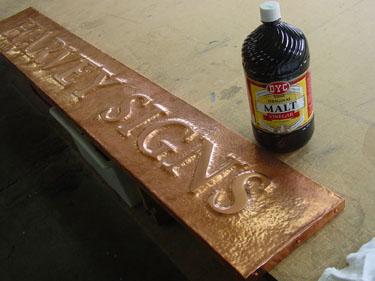
Here’s the completed panel ready to age up. We sat rags over the face and poured malt vinegar on it (lashings of it) and let it sit overnight. What you get the next day is a glorious mint / teal colour patina that looks like you’ve ruined the project. Don’t worry, just put it outside in the weather for a week or do as we did. We ragged on some watered down Resene Lumbersider Black and aged it up instantly.
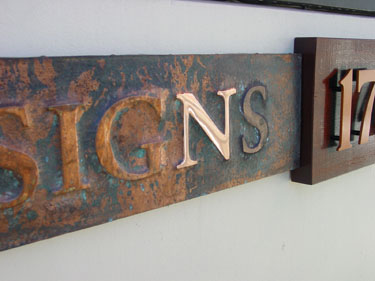
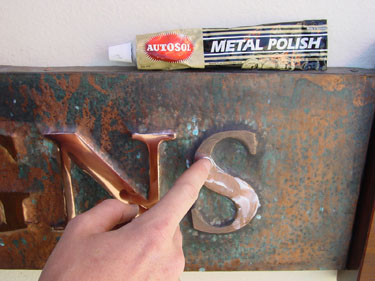
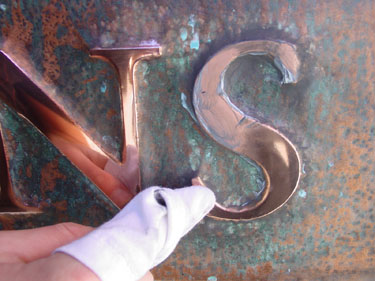
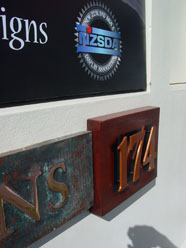
Here’s the sign finished and affixed to our Studio wall. You’ll see where the lettering has aged from being outside for two weeks. All we do now to polish up the lettering using “Autosol Metal Polish” shown in Photo 24. Rub it on with your finger then burnish clean with a clean rag. This is not hard and is very easy and quick to do. I am not putting any clear coats of anything over this, I want this to remain in its normal state. Most clears or lacquers will peel away at some stage so why bother.
There you go, all finished. The timber panel is the finisher and those ally routered letters are painted with One Shot Copper Metallic enamel. I’m going to gilded 23ct leaf into the centre portions of these. Signwriter: Jeff Harvey |
![]() Get inspired ! Subscribe
Get inspired ! Subscribe ![]() Get saving ! Apply for a DIY card
Get saving ! Apply for a DIY card
![]()
Can't find what you're looking for? Ask us!
Company profile | Terms | Privacy policy | Quality and environmental policy | Health and safety policy
Colours shown on this website are a representation only. Please refer to the actual paint or product sample. Resene colour charts, testpots and samples are available for ordering online. See measurements/conversions for more details on how electronic colour values are achieved.
What's new | Specifiers | Painters | DIYers | Artists | Kids | Sitemap | Home | TOP ⇧