Close Give Feedback
Resene Paints - home page
Follow us on Facebook Follow us on Pinterest Follow us on Instagram Follow us on YouTube

White wooden box

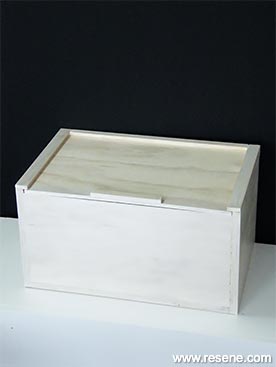
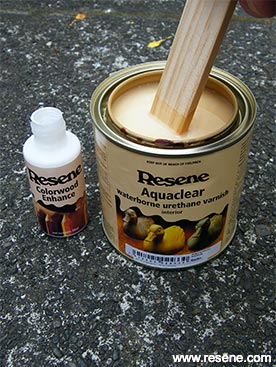
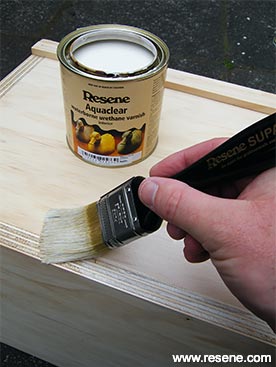
Create a cool storage box with sliding lid from plywood and finish it off with Resene Colorwood Enhance and Resene Aquaclear.

Ways with wood with Mark Rayner - Project 42

Difficulty level: Moderate

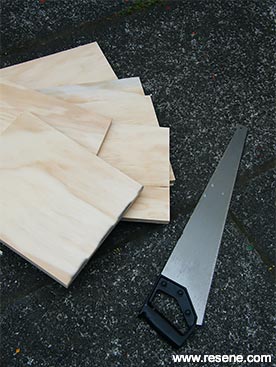
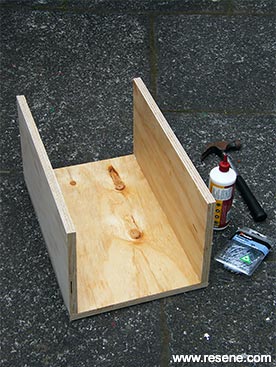
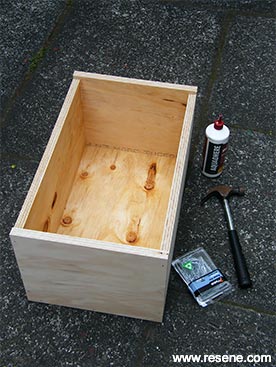
You will need: 20mm plywood cut to the following dimensions:
330mm x 500mm for the base
330mm x 280mm for the sides
500mm x 250mm for the front and back
9mm plywood cut to 330mm x 496mm for the lid
Two 30mm x 10mm timber mouldings cut to 340mm
20mm x 10mm timber moulding cut to 536mm, 475mm and 170mm
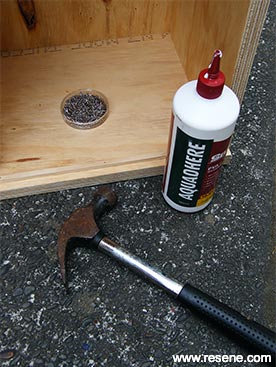
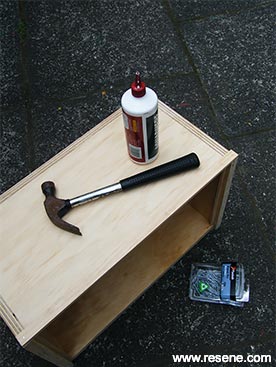
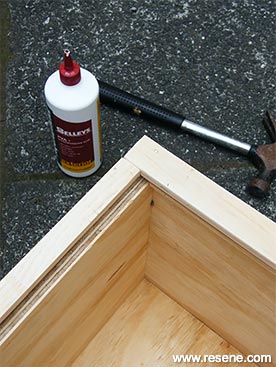
Two 10mm x 10mm timber mouldings cut to 290mm, 40mm panel pins, 16mm craft pins, hammer, paintbrush, paint stirrer, pencil, PVA glue, sandpaper, saw, set square and tape measure. Resene Aquaclear satin and Resene Colorwood Enhance white.

To get the look: Mark painted the background wall with Resene SpaceCote Flat tinted to Resene Nero and the table top with Resene Enamacryl tinted to Resene Half Alabaster.

Other ideas: For a shiny dark effect use Resene Colorwood Enhance black mixed with Resene Aquaclear gloss.

Step 1
Step one
Measure, mark and cut the plywood and timber moulding to the above dimensions and lengths. Smooth any rough edges with sandpaper.
Step 2
Step two
Attach the front and back sections to the base, as shown, fixing in place with panel pins and PVA glue.
Step 3
Step three
Attach the side sections into position, as shown, fixing with panel pins and PVA glue.
Step 4
Step four
Attach the 10mm x 10mm pieces of moulding to the inside of each side piece, as shown, ensuring each end is flush with the front and back sections. Fix with craft pins and PVA glue.
Step 5
Step five
Attach the longest piece of 20mm x 10mm moulding along the back edge, as shown, ensuring the ends are flush with the sides. Fix with panel pins, craft pins and PVA glue.
Step 6
Step six
Attach the next longest piece of 20mm x 10mm moulding at right angles to the back edge and the two lengths of 30mm x 10mm moulding along the side edges, as shown, and fix with panel pins, craft pins and PVA glue. Attach the last piece of 20mm x 10mm moulding to the lid to form a handle.
Step 7
Step seven
Mix the Resene Colorwood Enhance into the Resene Aquaclear and stir thoroughly with a paint stirrer.
Step 8
Step eight
Apply two coats of the coloured Resene Aquaclear to the box and lid, allowing two hours for each coat to dry. Slide the lid into position.

Other projects you might like to try

Bathroom revamp
Bathroom revamp

Weekend DIY
Make a modern mailbox
Modern mailbox

Ways with wood
Create wooden garden edging
Garden edging

Ways with wood
Make a wooden potting bench
Potting bench

Weekend Gardener
Create a rustic birdhouse
Rustic birdhouse

Weekend Gardener

View more projects


Order online now:
Testpots | Paints | Primers and Sealers | Stains | Clears | Accessories

Get inspired Get inspired ! Subscribe      Get saving Get saving ! Apply for a DIY card

Resene Paints Ltd

Can't find what you're looking for? Ask us!

Resene Paints (Australia) Limited   – www.resene.com

Follow us on Facebook Follow us on Pinterest Follow us on Instagram Follow us on YouTube
Videos on how to paint and stain your house
 

Colours shown on this website are a representation only. Please refer to the actual paint or product sample. Resene colour charts, testpots and samples are available for ordering online.   See measurements/conversions for more details on how electronic colour values are achieved.

What's new | Specifiers | Painters | DIYers | Artists | Kids | Sitemap | Home | TOP ⇧