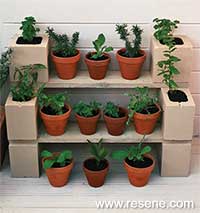
Mark Rayner demonstrates how to create heavenly herb planter shelves from a few concrete blocks and a couple of fence palings – the perfect project for a sunny spring weekend.
You will need: Two 1.8m fence palings, two 190mm half concrete blocks, four 140mm plain end standard blocks, drill with 10mm drill bit, paintbrushes, paint stirrer, pencil, coarse sandpaper, saw, tape measure, terracotta pots, good quality potting mix and assorted herbs, Resene Concrete primer, Resene Lumbersider tinted to a Resene Triple Canterbury Clay, Resene Terracotta Sealer and Resene Waterborne Woodsman penetrating oil stain tinted to Resene Uluru.
To get the look: Mark painted the decking with Resene Waterborne Sidewalk flooring and paving paint tinted to Resene Canterbury Clay and the background wall with Resene Lumbersider tinted to Resene Half Canterbury Clay.
![]()
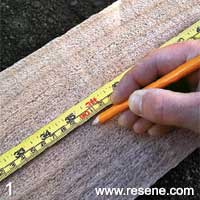
Step 1
Mark the halfway point, 900mm, on each of the fence palings.

Step 2
Mark a 90-degree line using the back of the
saw or a set square.
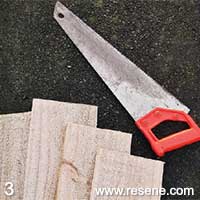
Step 3
Using the pencil line as a guide, cut each fence paling in half.
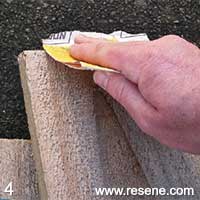
Step 4
Drill a 10mm drainage hole approximately 75mm from either end of each of the pieces of fence paling and smooth any rough sawn edges with sandpaper.
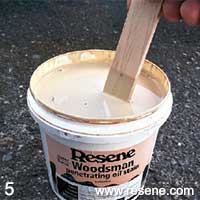
Step 5
Carefully stir the Resene Waterborne Woodsman with a paint stirrer.
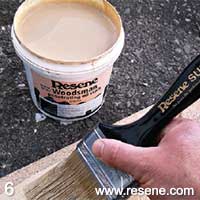
Step 6
Apply one coat of Resene Waterborne Woodsman in Resene Uluru, to three of the fence palings. Allow 24 hours to dry and then apply a second coat.
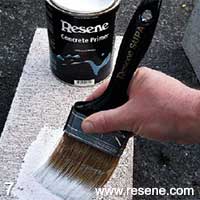
Step 7
Apply one coat of Resene Concrete Primer to the concrete blocks and allow two hours to dry.
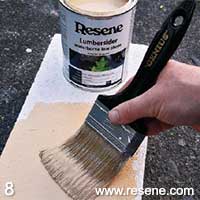
Step 8
Apply two coats of Resene Triple Canterbury Clay to the concrete blocks, allowing two hours for each coat to dry.
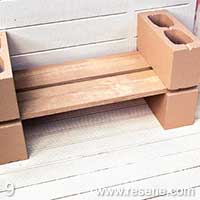
Step 9
Place two of the 140mm plain end standard blocks in position and lay two of the fence palings across the block to create the first shelf. Place the other two 140mm blocks on top and lay the third piece of fence paling across these to create the second shelf. Place the two 190mm half blocks at either end of the second shelf.

Step 10
Seal the terracotta pots inside and out with Resene Terracotta Sealer and allow to dry.
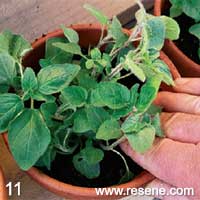
Step 11
Fill the terracotta pots with good quality potting mix and plant each one with a herb.
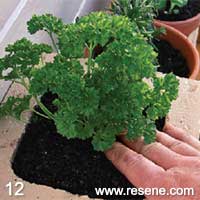
Step 12
Fill the end blocks with good quality potting mix and plant each one of these with a herb as well.
![]() Get inspired ! Subscribe
Get inspired ! Subscribe ![]() Get saving ! Apply for a DIY card
Get saving ! Apply for a DIY card
![]()
Can't find what you're looking for? Ask us!
Company profile | Terms | Privacy policy | Quality and environmental policy | Health and safety policy
Colours shown on this website are a representation only. Please refer to the actual paint or product sample. Resene colour charts, testpots and samples are available for ordering online. See measurements/conversions for more details on how electronic colour values are achieved.
What's new | Specifiers | Painters | DIYers | Artists | Kids | Sitemap | Home | TOP ⇧