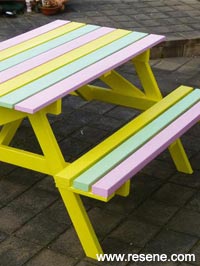
Mark Rayner shows you how to get ready for summer entertaining by giving an old wooden picnic table a new lease of life with a three-colour combination of vibrant Resene colours.
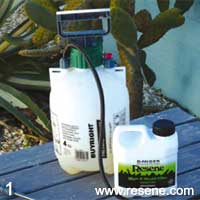
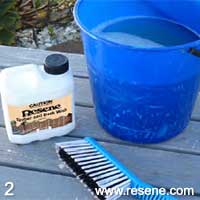
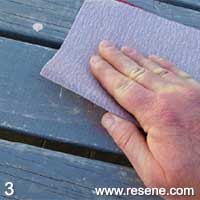
You will need: sandpaper, garden spray, bucket, stiff-bristled brush, paintbrushes, including a medium sized artists’ brush to paint gaps between wooden slats and low tack masking tape. Resene Moss & Mould Killer, Resene Timber and Deck Wash, Resene Stainlock waterborne stain sealer and Resene Enamacryl tinted to Resene Gorse, Resene Feijoa, and Resene Shocking.
Top tip: Because this wooden table had been previously stained, we used Resene StainLock to prime the surface but if your table is bare timber, use Resene Quick Dry instead. If in doubt, consult the staff at your nearest Resene ColorShop.
Another idea: Also for a subtle, contemporary look, paint your picnic table with a combination of Resene Tea, Resene Half Tea and Resene Quarter Tea.
![]()
Step 1
Treat any moss and mould. Mix one part Resene Moss & Mould Killer with five parts of clean water and spray onto moss and mould affected areas. Leave for 48 hours, then scrub and wash thoroughly with water.
Step 2
In a bucket, mix one part Resene Timber and Deck Wash with four parts clean water and scrub into the surface of the picnic table with a stiff-bristled brush. Rinse thoroughly with clean water and allow to dry.
Step 3
Sand the picnic table to remove any loose paint or wood stain and remove any sanding dust with a brush.
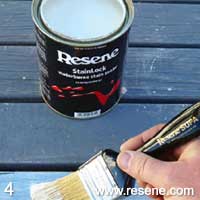
Step 4
Apply one coat of Resene StainLock to the entire table and allow to dry.
Step 5
Turn the table upside down and paint the underside and the legs with two coats of Resene Gorse. Again allow two hours for each coat to dry.

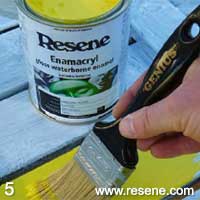
Step 6
Turn the table the right way up and paint every third slat with two coats of Resene Gorse. Again allow two hours for each coat to dry.
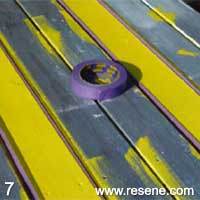
Step 7
Mask off the edges of the painted slats, as shown,
with low-tack masking tape.
Step 8
Paint the alternate remaining slats with two coats of Resene Shocking, allowing two hours for each coat to dry.
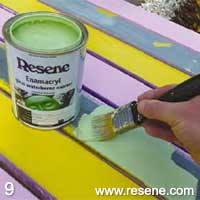
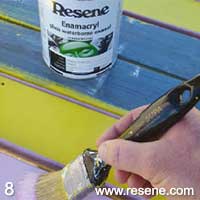
Step 9
Paint the remaining slats with two coats of Resene Feijoa. Again, allow two hours for each coat to dry.
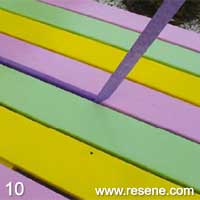
Step 10
Carefully remove the masking tape before the paint dries.
![]() Get inspired ! Subscribe
Get inspired ! Subscribe ![]() Get saving ! Apply for a DIY card
Get saving ! Apply for a DIY card
![]()
Can't find what you're looking for? Ask us!
Company profile | Terms | Privacy policy | Quality and environmental policy | Health and safety policy
Colours shown on this website are a representation only. Please refer to the actual paint or product sample. Resene colour charts, testpots and samples are available for ordering online. See measurements/conversions for more details on how electronic colour values are achieved.
What's new | Specifiers | Painters | DIYers | Artists | Kids | Sitemap | Home | TOP ⇧