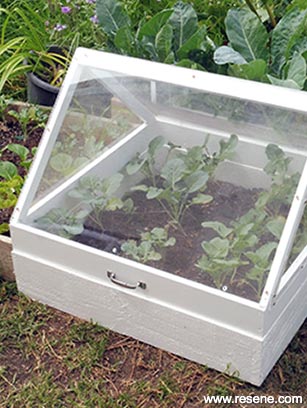
A cosy bed
Get ready for the cooler months with this nifty covered raised bed – perfect for extending the growing season.
You will need:
- 20mm exterior screws
- 35mm exterior screws
- 65mm exterior screws
- 90mm x 20mm treated timber cut to the following lengths:
- 35mm x 20mm treated timber cut and mitred to the following lengths:
- 4 x 530mm
- 45mm x 20mm x 730mm length of treated timber
- 25mm x 20mm x 730mm length of treated timber
- Clear acrylic sheet
- Cordless drill with drill bits
- Exterior handle and 2 x exterior hinges
- Exterior PVA glue
- Hand saw and long ruler or straight edge
- Marker pen and mitre saw
- Paintbrush and pencil
- Resene Lustacryl tinted to Resene Double Alabaster
- Resene Quick Dry
- Sandpaper and tape measure
- Treated fence palings cut into four 750mm lengths
Top tip: Use an offcut of timber to keep the top propped open when ventilation is required.
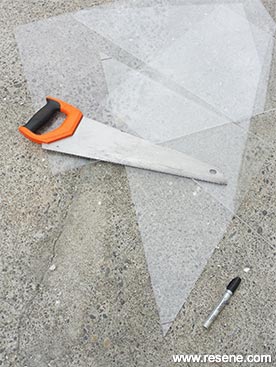
Handy hint: To get really accurately fitting triangular pieces of acrylic, use the end gables as a template, tracing directly onto the acrylic using a marker pen. Once sawn, remove any marker pen lines with methylated spirits.

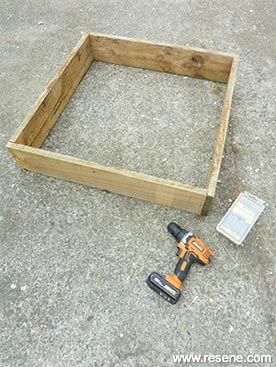 Step one
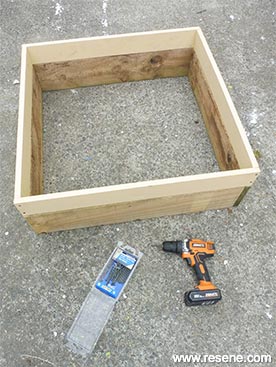
Attach the four pieces of fence paling together to form a 770mm square frame, fixing at each corner with 65mm screws.
 Step two
Measure, mark and cut the 90mm x 20mm timber to the lengths listed. smooth any rough edges with sandpaper.
 Step three
Place these pieces on top of the fence paling frame and drill two pilot holes at each corner.
 Step four
Fix these together at each corner with 65mm screws and PVA glue. Allow glue to dry.
 Step five
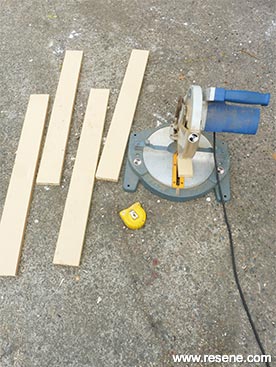
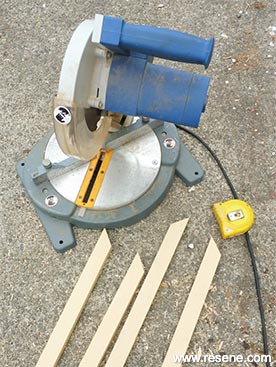
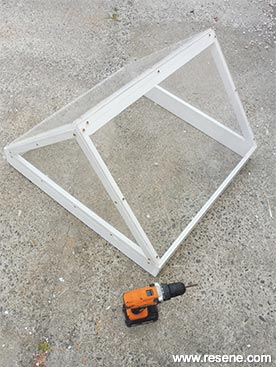
Measure, mark and cut the 35mm x 20mm timber to the lengths listed above, ensuring each end is mitred at 45 degrees. smooth any rough edges with sandpaper.
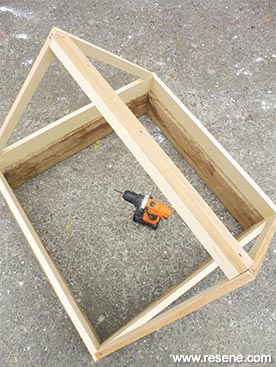
 Step six
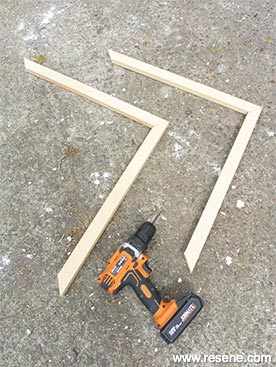
Attach these pieces together to form two ‘L’ shapes, as shown, fixing at each corner with PVA glue and 35mm screws, drilling pilot holes first.
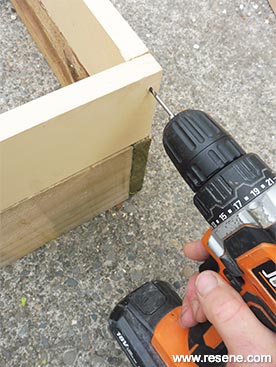
 Step seven
Attach the two ‘L’ shapes to the base frame, as shown, fixing at each corner with PVA glue and a 35mm screw and a 65mm screw, drilling pilot holes first.
 Step eight
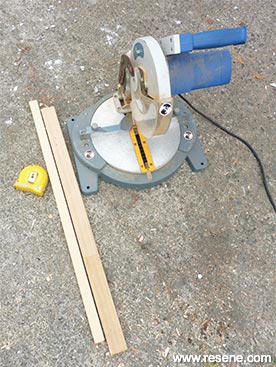
Measure, mark and cut the remaining pieces of timber to the lengths listed. Smooth any rough edges with sandpaper.
 Step nine
Attach these to the top of the frame, as shown, fixing with 35mm and 65mm screws and PVA glue. Allow glue to dry.
 Step ten
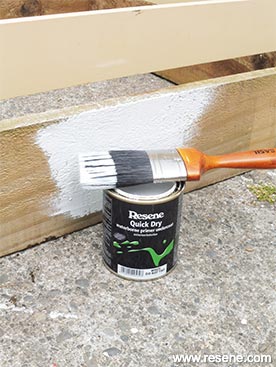
Apply one coat of resene Quick dry to any areas of unpainted timber and allow to dry.
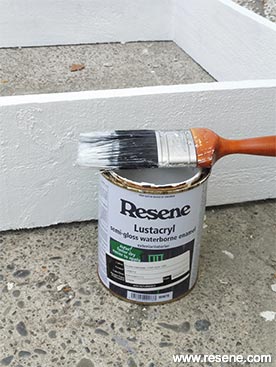 Step eleven
Apply two coats of resene Lustacryl tinted to resene double Alabaster to the entire unit, allowing two hours for each coat to dry.
 Step twelve
Measure, mark and cut two pieces of acrylic measuring 530mm x 770mm and two triangular pieces measuring approximately 770mm along the longest side and approximately 540mm along the two shorter sides.
 Step thirteen
Attach the pieces of acrylic to the frame, fixing with 20mm screws. Drill pilot holes first to prevent the acrylic from cracking.
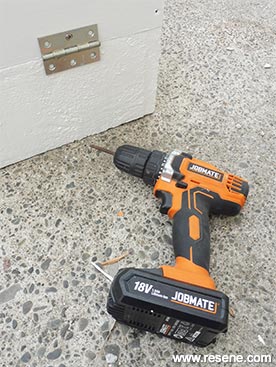 Step fourteen
Attach the two hinges to the back of the unit spaced 100mm in from each corner, fixing with 20mm screws.
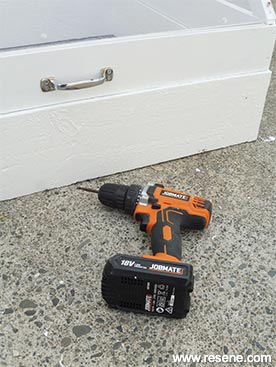 Step fifteen
Fix the handle to the centre of the front of the unit using 20mm screws.
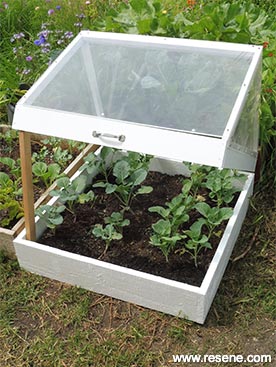 Garden bed completed
With top open.