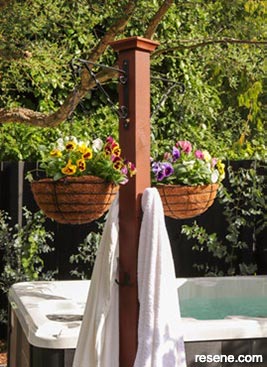
Keep towels off the ground while adding a splash of colour to your garden with hanging-basket flowers.
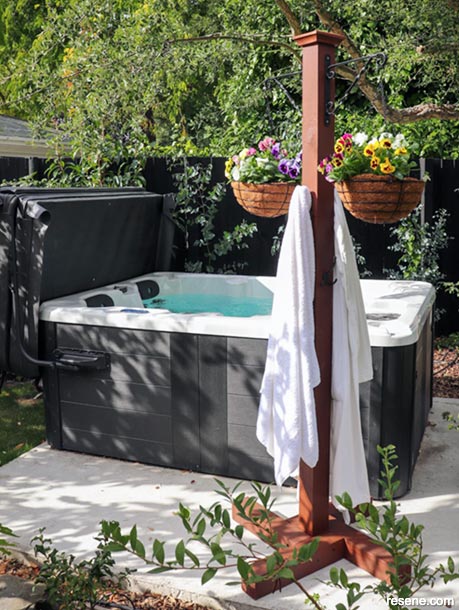
Top tip: Flowers in hanging baskets will need to be watered more frequently than those in pots. Here's another idea: This towel stand would also be handy next to a pool during the summer months.
![]()
Materials
Tools
How to build a spa pool towel stand:
 Step one
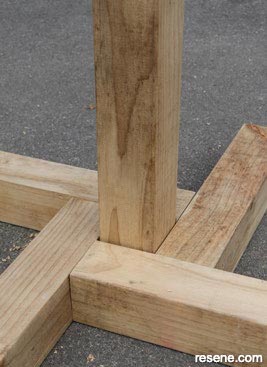
Place all five lengths of timber into position, as shown, with the 2100mm length.
 Step two
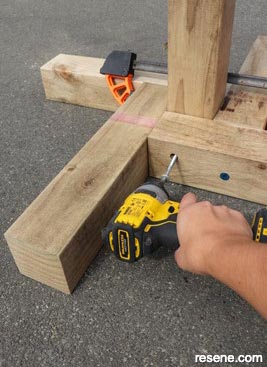
Using an impact driver, screw the base together using two screws for each of the four base lengths: one screw to attach it to the vertical post and one to attach it to the adjacent support (as shown). Make sure the screws are not directly opposite each other to avoid them crossing over and touching in the middle. You may find a clamp useful to help hold it together.
 Step three
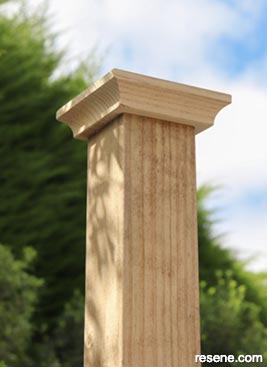
Using a bugle screw from above (or glue if you prefer), attach the post cap to the top of the stand.
 Step four
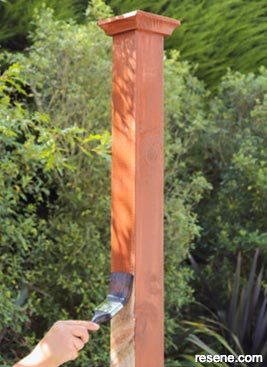
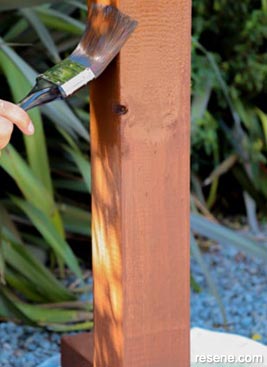
Stain the stand with Resene Waterborne Woodsman penetrating oil stain and allow to dry. Look out for any drips on the vertical sides.
 Step five
Apply a second coat of the Resene stain and allow to dry.
 Step six
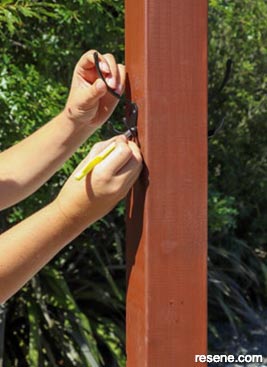
Mark out the position of the screw holes for all four hooks, with one hook on each side of the post. If kids will be hanging their towels, a couple of lower hooks could be handy; likewise, a couple of higher hooks could be useful for longer robes. A tape measure may be helpful here to ensure the hooks are centrally positioned and vertically level.
 Step seven
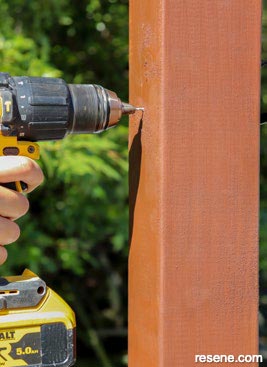
Drill pilot holes for the hooks at each of the marked points.
 Step eight
Using 35mm screws, screw each hook into place
 Step nine
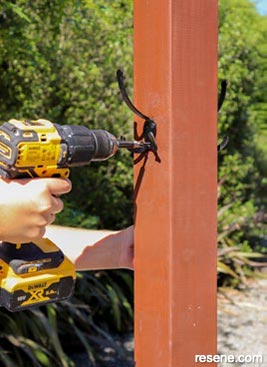
Make a mark 4cm down from the base of the cap, on two opposite sides of the post. Align the top of the hanging basket bracket with the mark and screw each bracket into position, drilling pilot holes first. You may find a clamp useful to hold the brackets in position.
 Step ten
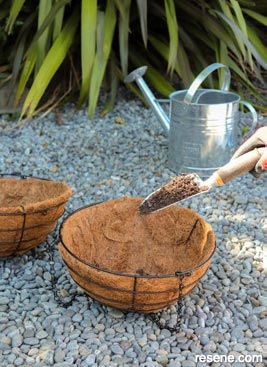
Half fill both flower baskets with potting mix.
 Step eleven
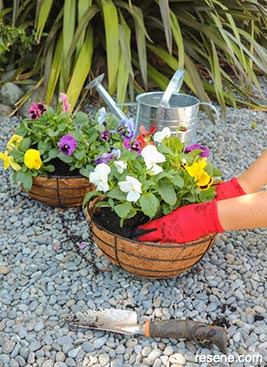
Plant your flowers and top up with potting mix if needed.
 Step twelve
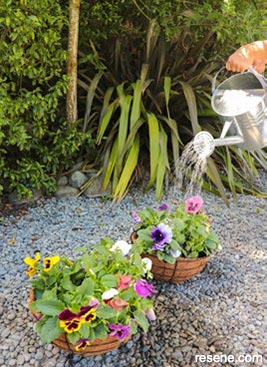
After planting, water both baskets well.
 Step thirteen
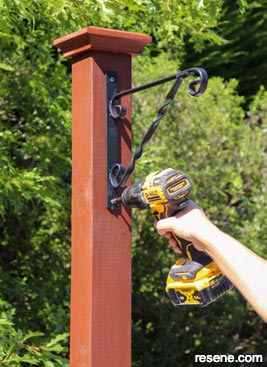
Move the stand into position and hang both baskets on the brackets.
 Details
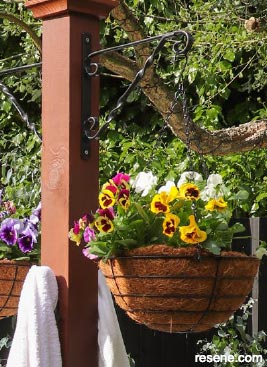
A close up of the hanger and flower baset.
![]() Get inspired ! Subscribe
Get inspired ! Subscribe ![]() Get saving ! Apply for a DIY card
Get saving ! Apply for a DIY card
![]()
Can't find what you're looking for? Ask us!
Company profile | Terms | Privacy policy | Quality and environmental policy | Health and safety policy
Colours shown on this website are a representation only. Please refer to the actual paint or product sample. Resene colour charts, testpots and samples are available for ordering online. See measurements/conversions for more details on how electronic colour values are achieved.
What's new | Specifiers | Painters | DIYers | Artists | Kids | Sitemap | Home | TOP ⇧

