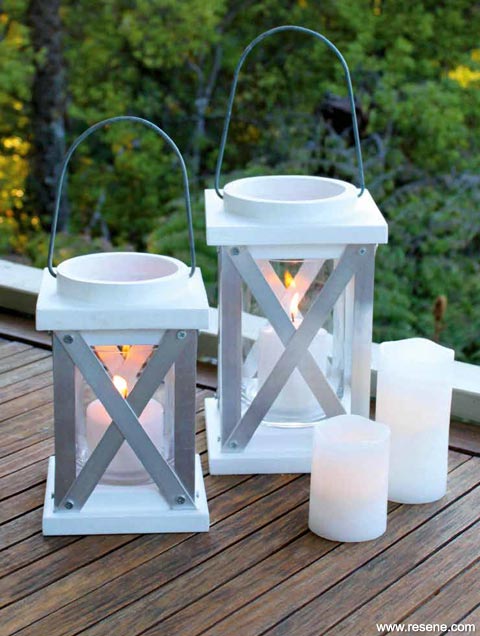
- Straight-sided glass candle holder (mine is 200mm high x 110 diameter)
- 1.2m - 180mm x 19mm dressed pine
- 1m - 20mm x 20mm x 1.5mm aluminium corner
- 3m – 20mm x 1.6mm aluminium strip
- 8g x 32mm wood screws, 8g x 18mm countersunk screws for aluminium
- #8 wire or similar for the handle
- Hack saw or tin snips
- Drop saw or handsaw
- Jigsaw, clamps, pencil
- Sander and sandpaper
- Screwdriver, drill bits and countersink bit
- Wood glue, wood filler
- Resene Quick Dry Primer, test pots & brushes.
Cutting List: 3 x 180mm x 180mm and 2 x 155mm x 155mm.
Cost: $54 excluding candle holder & paint.
Note: Always ensure lit candles are under adult supervision. Always extinguish all candles before going to sleep. Replace candles when they are at least 20mm from the top edge of the candleholder.
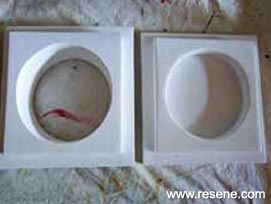
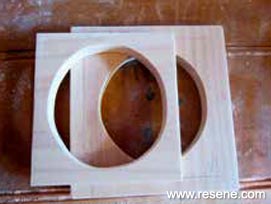 Step one
Centre the glass on the 2 smaller pieces, mark the circle. Drill a hole with a large drill bit. Using the jigsaw and cutting to the outside of the pencil line, cut out the circle on both. Centre, mark and cut the same hole out of one of the large pieces. Sand well.
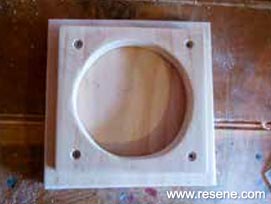 Step two
Bottom: centre a small cut-out piece to a solid 180mm square. Top: centre and join large and small cut out pieces. Glue and screw pieces together and allow to dry. Fill screw holes and sand when dry.
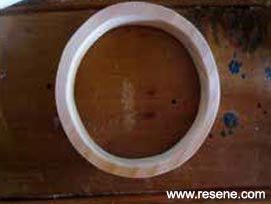 Step three
Mark the same circle for the handle holder, with a second line 12mm outside 4 the first. Cut out carefully with the jigsaw. Sand well. Centre, glue and clamp this piece to the other side of the top. Sand well. The glass should slide through the top easily.
 Step four
Undercoat both pieces with Resene Quick Dry Primer. Allow to dry. Top coat. I used a test pot in
White.
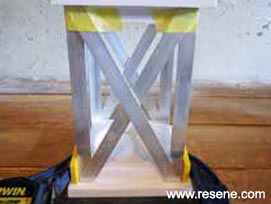 Step five
Cut 4 lengths of aluminium corner at 230mm. Using the clamps, assemble, with the base, corner brackets and top in place. Mark the angles on the aluminium strip so that the top and bottom corners meet. Cut with tin snips or a hack saw.
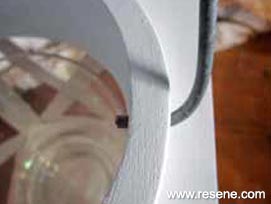 Step six
Using a metal bit, drill through each cross brace and corner bracket in the upper and lower corners. Insert screws. Cut a piece of #8 wire to length, bend to curve in the centre and bend right angles at each end. Drill holes in each side of the top circle and insert the wire.