DIY project from NZ Gardener magazine
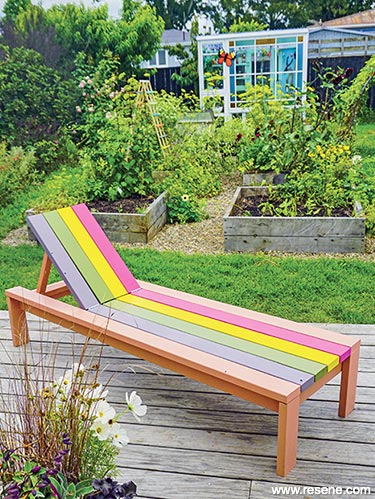
Jacob Leaf shows you how to build a stylish sun lounger.
Legs
Paint and Primers
Cost: $150 excluding Resene products.
Note: I painted my cut lengths of wood before constructing the sun lounger to achieve an even finish. First, I cleaned the wood with Resene Timber & Deckwash, then undercoated with Resene Quick Dry Waterborne Primer and then painted.
 Step one
 Step two
 Step three
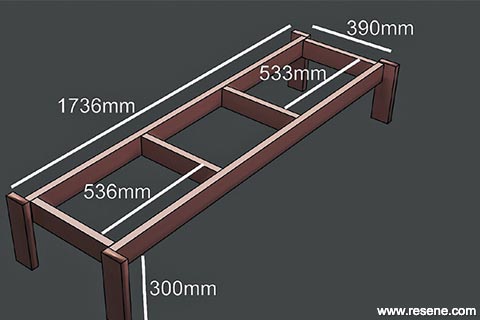
Step one: Build the frame with the 2 pieces of 1736mm decking timber and 4 pieces of the 390mm decking timber, attaching everything with screws. Attach 2 of the 390mm pieces between each end of the 1736mm pieces to form a rectangle. Measuring from the inside at one end, attach the third 390mm piece at 536mm. From the opposite end, measuring from the inside, attach the fourth 390mm piece at 533mm. Attach the 4 legs to the outside of the frame, screwing them directly to the ends of both 1736mm pieces of the frame.
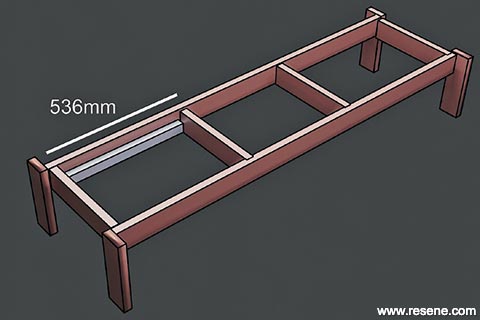
Step two: Screw both the 536mm balusters to the inside of the larger 536mm opening of the frame. These will become cleats to hold the back support and back stops.
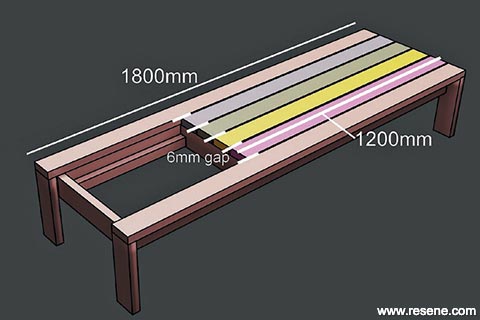
Step three: For the lower-seat slats, attach the 2 pieces of 1800mm decking timber to the outer edges. Line them up so they’re flush with the tops of the legs; screw them in place. Attach the 1200mm slats (all 4) to the middle, leaving a 6mm gap between each.
 Step four
 Step five
 Step six
Step four: To make the backrest, screw the 3 pieces of 330mm baluster timber to the 4 pieces of 600mm decking timber. Leave a 6mm gap between each slat. If you want the backrest to sit flush with the rest of the lounger when closed, cut down the 600mm lengths to compensate for the space the hinge adds. My hinge space added 8mm, so I cut each 600mm backrest slat down to 592mm.
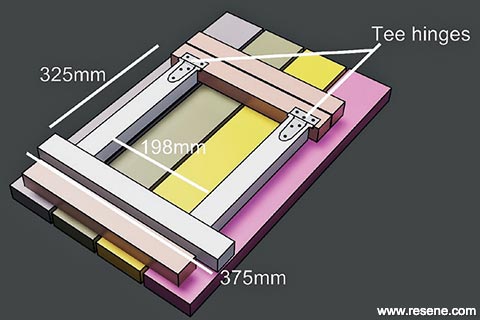
Step five: For the hinged back support, arrange the 2 x 325mm pieces of baluster timber at right angles to the 330mm pieces of baluster timber so that there is a 198mm gap between them. Screw on the 100mm tee hinges. Screw the remaining 375mm piece of baluster timber at a right angle to the 325mm pieces.
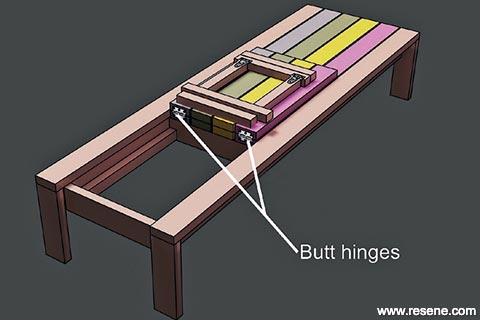
Step six: Lay the backrest in position and attach it to the lounger slats with the butt hinges.
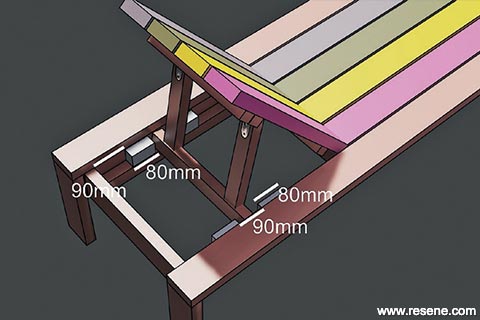
Step seven: To attach the stop blocks, screw the 4 pieces of 80mm baluster timber to the cleats. I placed mine 90mm in from the head of the lounger, allowing another gap of 90mm for the second set. Space these in any position when reclining. Just make sure the stop blocks don’t prevent the backrest from folding down flat. For a clean finish, hide the screw heads with wood filler.
 Step seven
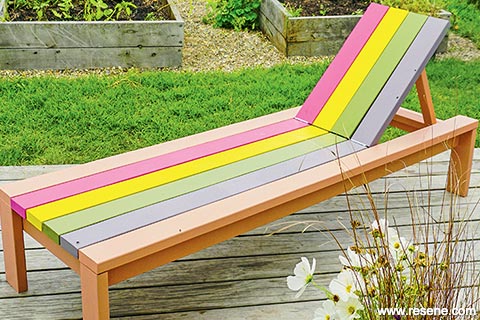 Lounger with painted slats
Project by: Jacob Leaf
› Download a PDF of this project › Watch a video of this project
![]() Get inspired ! Subscribe
Get inspired ! Subscribe ![]() Get saving ! Apply for a DIY card
Get saving ! Apply for a DIY card
![]()
Can't find what you're looking for? Ask us!
Company profile | Terms | Privacy policy | Quality and environmental policy | Health and safety policy
Colours shown on this website are a representation only. Please refer to the actual paint or product sample. Resene colour charts, testpots and samples are available for ordering online. See measurements/conversions for more details on how electronic colour values are achieved.
What's new | Specifiers | Painters | DIYers | Artists | Kids | Sitemap | Home | TOP ⇧

