A step-by-step guide to making a stylish wooden seat.
You will need:
Also required: Resene Lumbersider in Resene Hyperactive (or you can use a wood stain from the Resene Woodsman range), 50mm nails, galvanised jolthead 60mm nails, galvanised jolthead screws – 1 and 1/4 inch x 8 galvanised posidrive, jigsaw, plane, square, drill, tape measure and pencil.
![]()
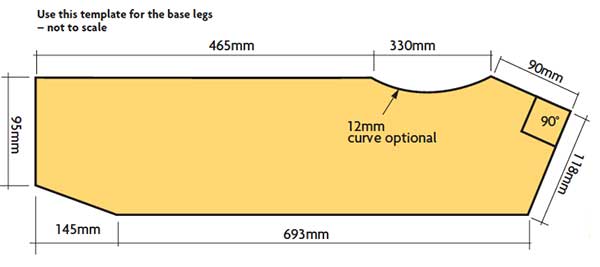
Use this template for the base legs - not to scale:
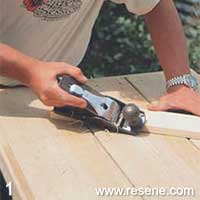
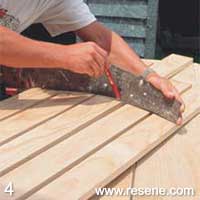
Step 1
Cut the base legs to the dimensions given. Plane the seat slats on the top edges.
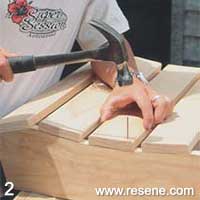
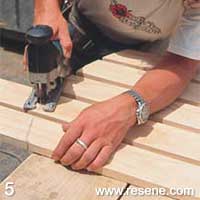
Step 2
Spacing the seat slats 18mm apart, attach slats to base legs using three 50mm galvanised nails at each end of the slats.
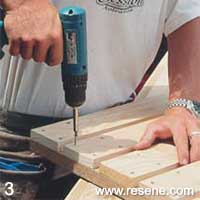
Step 3
To assemble the chair back, lay out five pieces of 100mm x 25mm timber approx 17mm apart and attach to a 100mm x 25mm piece of timber – which will be the base of the chair back. Use four screws for each slat, and ensure the slats are flush.
Step 4
Measure up 750mm from the base of the back on both sides. Mark out an arc between the two points with a bendy piece of thin timber or plastic – we used a saw blade.
Step 5
Use a jigsaw or panel saw to cut the arc shape.
Step 6
Attach the front legs from the inside of the base legs using four screws at each end. The distance between the underside of the base leg and the bottom of the front legs should be 213mm to ensure the chair sits flat.
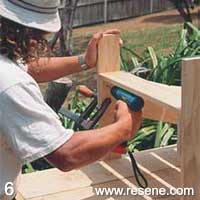
Step 7
Measure up 380mm from the base of the chair back on the underside to position the middle support. Attach the middle support – the longer of the two back supports – at that mark, ensuring you have an overhang of 36mm on either side to support the arms. Position the top support, ensuring it’s flush with the sides. Use four screws per slat.
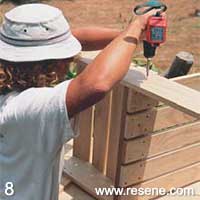
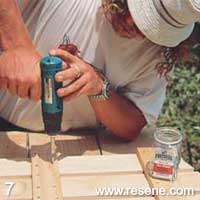
Step 8
Attach chair back to base legs using three screws on either side. Place the seat at the angle given on the template.
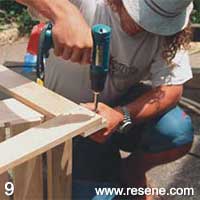
Step 9
Fix arm rest supports using four screws at each end, ensuring the supports are flush with the top of the front legs but 18mm in to allow for the decorative shaped panel.
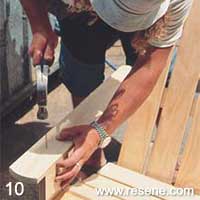
Step 10
Attach arm rests to arm supports using five 50mm galvanised nails, ensuring you have an 80mm overhang on the front of the chair and the arm rest is flush with the back. The arc detail on the front of the arm rest is optional.
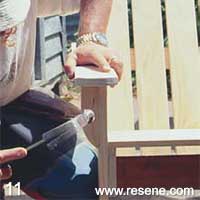
Step 11
Attach the decorative shaped panels to arm supports and front legs using 50mm galvanised nails.
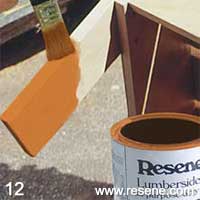
Step 12
Secure the front seat panel between the front legs using two 60mm galvanised nails at each end, leaving an 18mm gap at the top. Paint chair with two coats of Resene Lumbersider in Resene Hyperactive.
![]() Get inspired ! Subscribe
Get inspired ! Subscribe ![]() Get saving ! Apply for a DIY card
Get saving ! Apply for a DIY card
![]()
Can't find what you're looking for? Ask us!
Company profile | Terms | Privacy policy | Quality and environmental policy | Health and safety policy
Colours shown on this website are a representation only. Please refer to the actual paint or product sample. Resene colour charts, testpots and samples are available for ordering online. See measurements/conversions for more details on how electronic colour values are achieved.
What's new | Specifiers | Painters | DIYers | Artists | Kids | Sitemap | Home | TOP ⇧