From the Resene decorating blog
When it comes to adding curb appeal to your home, it will come as no surprise that your fence plays a significant role. Whether you are planning on selling soon or you simply want your property to look more polished, painting, staining, or maintaining your fence is always a smart investment. Thankfully, the process is relatively simple and straightforward.
Although proper preparation can seem daunting and time consuming at first, it’s an integral part of getting great finish and should not be overlooked. Starting with a beautifully clean and smooth surface is imperative to getting a flawless final product, so don’t simply paint over what’s already there. This could result in blistering, flaking and poor adhesion of your new topcoat, and you’ll likely find yourself having to repeat the whole process over again much sooner rather than later.

Whether your existing fence is timber, iron, concrete, brick or PVC, the prep is always the same. “Sand off old paint, scrub off imperfections with a brush and remove mould with Resene Moss & Mould Killer. Then, thoroughly clean off any residue with Resene Timber and Deck Wash for wooden fences and stained fences or Resene Paint Prep and Housewash for painted fences and wait for the fence to dry,” explains Resene Paint Expert Jay Sharples.
Top tip: On painted surfaces, mould often looks like dirt and frequently the two cannot be visually distinguished. By wetting the surface and rubbing, mould will turn to slime – and you’ll immediately know what you’re up against.
For existing timber fences, once you have properly prepped them as above, spot prime with Resene Quick Dry primer undercoat and allow it to dry before applying two coats of Resene Lumbersider in your chosen Resene colour. If you prefer your topcoat to have a higher gloss finish, opt for Resene Sonyx 101 semi-gloss or Resene Hi-Glo gloss. If your timber fence was previously stained and you now wish to paint it, cover its surface with Resene Wood Primer before applying two topcoats of Resene paint in either Resene Lumbersider or Resene Sonyx 101. Both these products are available in a myriad of colours and can be tinted to match or complement your home’s exterior.
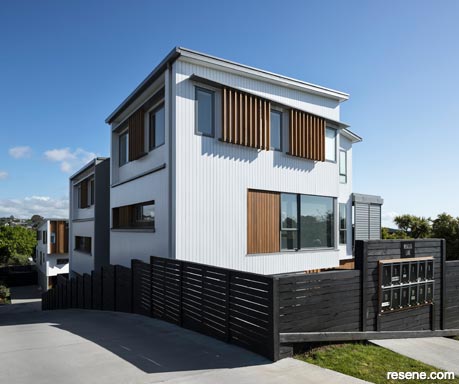
Resene Triple Black White is a timeless choice for a fence; it was also used on this home’s cladding. Design by Crosson Architects, image by Simon Devitt.
If you’re more of a naturalist and you want your timber fence to maintain its natural wood patina, it’s common to assume that all you need is a clear coat. However clear coats are not recommended on exterior timber as they don’t provide enough protection. Instead apply two coats of Resene Waterborne Woodsman timber stain to help protect the wood from the sun’s UV rays. Choose a colour that’s similar to your timber’s natural colour for a bare look or go for a darker colour for a richer look. It is worth noting that exterior wood stains are semi-transparent, so they do require recoating approximately every 2 to 3 summers. Paint will last longer before requiring maintenance, but it will hide the wood’s natural grain.
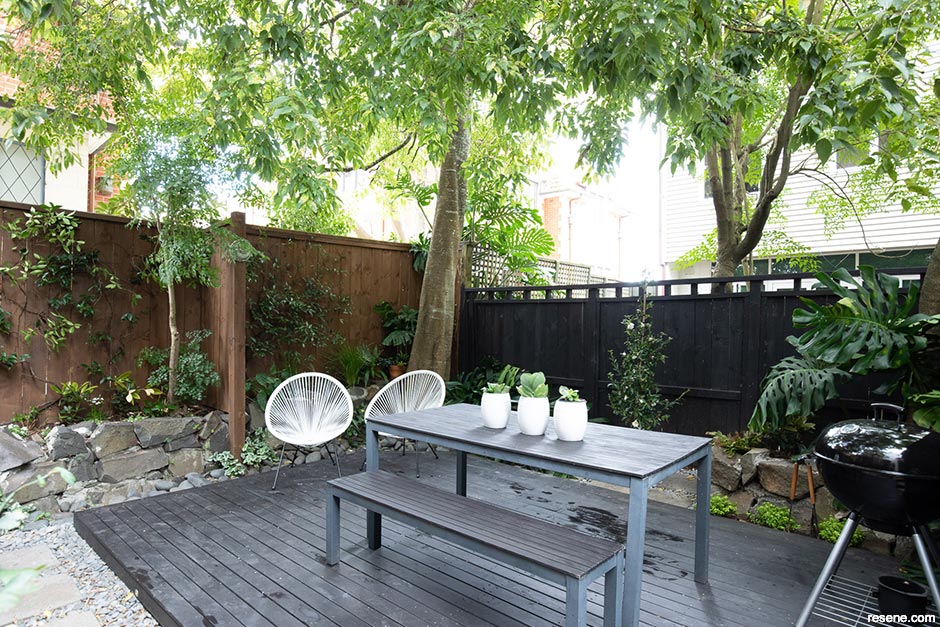
Jay’s best recommendation for painting front timber fences? “Use the lightest colour paint possible so that the wood absorbs the least amount of heat.” Try popular choices like Resene Sea Fog, Resene Merino, Resene Alabaster, Resene Half Spanish White or Resene Black White. Dark colours absorb heat and can cause timber to warp or splinter. Unlike the front fence, boundary fences serve quite a different purpose and are often not needed as a feature. In that case, painting your boundary fences in a dark colour will allow them to blend away behind foliage so planting can be the hero – try Resene Oilskin, Resene Ironsand or Resene Tuna.
When using dark colours outside, use a topcoat with Resene CoolColour technology added. It’s available in a wide range of paints and stains. “Resene CoolColour will look the same as a standard colour, but surface heat will build up slower; and to a significantly lower level than a 'not so cool' traditional colour,” explains Jay. “Resene CoolColour doesn’t promise to resolve all heat related issues but it definitely reduces the stress on the substrate caused by the heat absorption of a standard dark colour.”
“If a newly treated timber fence still has a solvent smell to it, or is still wet or damp, you should hold off painting until the smell has diminished and the timber has dried,” says Jay. “If there is no smell and the timber is dry, clean and free from contamination, sand any sharp edges before applying Resene Quick Dry primer undercoat and then two coats of your chosen Resene topcoat.”
For an existing decorative iron or old corrugated panel fence, the prep work starts the same as with timber. Treat it for moss and mould with Resene Moss & Mould Killer and thoroughly wash down with Resene Paint Prep and Housewash to remove any loose or flaking paint. Any bare areas will then need to be primed with Resene GP Metal Primer before applying two coats of your chosen Resene paint colour in either Resene Lumbersider or Resene Sonyx 101.
Existing concrete fences also require Resene Moss & Mould Killer treatment and the removal of any lose or flaking paint. Once prepped, any bare concrete will need to be spot primed with Resene Sureseal, before applying two coats of your chosen Resene topcoat. “The Resene topcoat product will depend on your home’s style – do you have a Mediterranean style/art deco home? If yes, you may want to use a Resene AquaShield to ensure your property has a cohesive overall look. Are you trying to achieve a weathertight finish? If yes, you could use Resene X-200 weathertight membrane”, explains Jay. “For a standard concrete fence/wall you can simply use Resene Sonyx 101 as the topcoat.”
For new concrete fences, give it a thorough wash with fresh water to start. Any cracks less than 1mm can be sealed with Resene X-200 or Resene Brushable Crack Filler brushed into them. Then, prime the new concrete with Resene Concrete Primer and apply two coats of Resene Sonyx 101 in your chosen Resene colour.
If you intend to paint your brick fence, apply a single coat of Resene Sureseal before two topcoats of Resene Sonyx 101 in your chosen gloss level. Make sure your prep work is done by treating the surfaces for mould with Resene Moss & Mould Killer and clean off any residue with Resene Paint Prep and Housewash first.
For PVC fencing, if the fence is new, thoroughly clean it prior to painting to remove any surface residue, Resene Paint Prep and Housewash is an excellent option. If the fence is older, its recommended to treat it with Resene Moss & Mould Killer first. You can then apply two coats of your chosen Resene paint colour in either Resene Lumbersider or Resene Sonyx 101 directly to the substrate.
Remember: a fence is an investment and maintaining it is crucial to increasing your home’s curb appeal – and making sure it lasts. Old and peeling paint, poor colour choices or a generally lacklustre look can all work to devalue your home. By adding fresh coats of Resene paint or stain that complements your home’s exterior and landscaping, you will be adding undeniable value to your property and keep it looking great for years to come.
Did you know… That while Resene Lumbersider and Waterborne Woodsman are the most popular Resene finishes for timber fences, Resene Woodsman Wood Oil Stain is also available for those who prefer a solventborne wood oil finish?
June 30, 2020
Visit your local Resene ColorShop for more colour ideas and all the expert advice and products you need for a superb finish on all your decorating projects.
Book a colour consult | Ask a Colour Expert | Ask a Paint Expert
Resene's decorating blog
Paint your home beautiful! Discover the latest decorating trends, tips and colour news.
![]()
Previous «
6 key things you need to know before you paint your fence
![]()
Blog home
View the latest trends, tips and news
![]()
» Next
The tides are changing
![]() Get inspired ! Subscribe
Get inspired ! Subscribe ![]() Get saving ! Apply for a DIY card
Get saving ! Apply for a DIY card
![]()
Can't find what you're looking for? Ask us!
Company profile | Terms | Privacy policy | Quality and environmental policy | Health and safety policy
Colours shown on this website are a representation only. Please refer to the actual paint or product sample. Resene colour charts, testpots and samples are available for ordering online. See measurements/conversions for more details on how electronic colour values are achieved.
What's new | Specifiers | Painters | DIYers | Artists | Kids | Sitemap | Home | TOP ⇧