- Old chisel or screwdriver
- Hammer
- Staple-gun or fabric tacks
- Chalk
- Fabric
- Gimp or studs
- PVA glue or gimp pins.
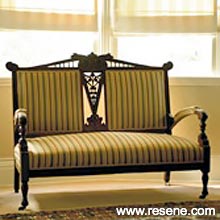
Upholsterer: Peter Derbyshire. Fabric: Alderbury Straw from Textilia. Gimp: Potential by Pamela
 Step 1
Measure all upholstered parts of the furniture to a few centimetres past each edge, from front to back and side to side.
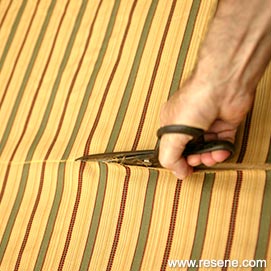 Step 2
Unroll fabric and ensure weave is running towards you. Measure up fabric for panels and mark cutting lines with chalk. Cut fabric. If using striped material, ensure stripes on back will match stripes on seat.
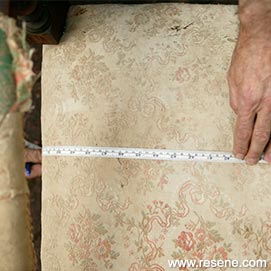
 Step 3
Remove all old gimp, upholstery fabric and tacks with hammer and chisel, working away from furniture frame so as not to damage it.
 Step 4
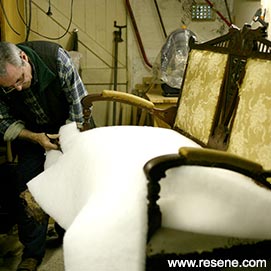
Check that old webbing still supports springs. If adding webbing, nail it to one side of frame, run it across base of sofa, wrap around small block of wood, stretch onto frame and secure. Always cover base, even if with calico or an old sheet, to contain any dust from the wadding.
 Step 5
If wadding has become unevenly spread, dacron can provide an interim solution to re-padding. Lay across seat, pulling through to back, and trim to size.
 Step 6
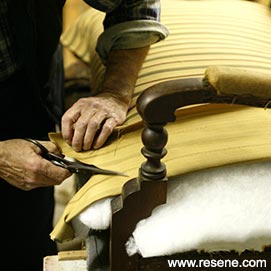
Find middle of new seat fabric and check pile direction to ensure it’s the right way round. Temporary tack at front, pull through to back and temporary tack. Start to tack into place, pulling firmly, so there is an even tension. Leave corners until last.
 Step 7
For rear corners, fold fabric in a triangle away from post and cut down the middle to a couple of centimetres from where the post meets the seat. Pull tightly around the post and tack. For front corners, fold in a rectangle and cut on an angle to where the arm meets the seat. Pull tightly around the post and tack.
 Step 8
If stapling, trim away excess fabric with Stanley knife. If tacking, trim fabric quite close first, then double edge over before tacking for a tidy line. Treat arms as above.
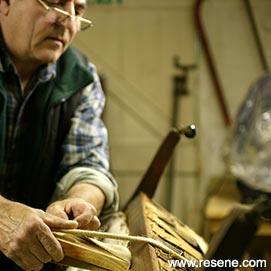
 Step 9
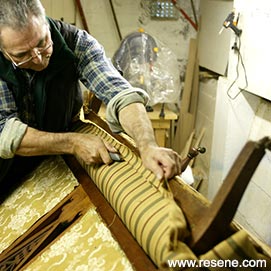
Ensure gimp is the right way up. Measure out slightly more than required for each run, starting from a corner. For close-woven gimps, use tacks or glue; for more open gimps, use glue. Double over end of gimp and secure, then attach along length or around panel. Guide gimp gently around corners, rather than folding it over.
Search habitat magazine stories
Want to get your own free copy of future issues of habitat magazine?
Printed copies of habitat highlights are available from late March 2024 at Resene ColorShops and resellers, while stocks last. You can view back issues of habitat magazine online.
-
Specifiers:
- Earn CPD points reading this magazine – If you're a specifier, earn ADNZ or NZRAB CPD points by reading habitat magazine. Once you've read an issue request your CPD points via the CPD portal for ADNZ (for NZ architectural designers) or NZRAB (for NZ architects). Join our specifier and trade database...
If you have an idea, project or story that you think would suit habitat, we’d love to hear from you. Please drop us an email with your details and include photos if submitting a project.
Sign up for a DIY card and Save! Australia | New Zealand