From Habitat magazine - issue 21
Adding a birdhouse to the garden is a win-win – you're supporting local bird life and gaining a slug and bug buster.
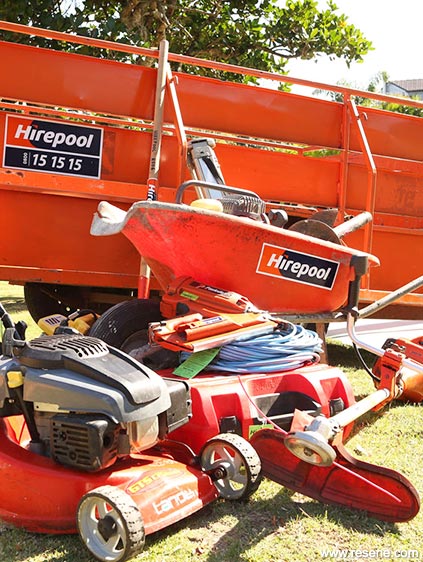
Tools and equipment: work bench, slide compound, mitre saw, nail gun, or hammer and galvanised brad nails, belt sander or sheets of sandpaper, drill and bits, including 42mm hole saw bit, jigsaw, post-hole borer or spade, wheelbarrow, safety googles and ear-muffs, Resene paint and brushes.
Materials: 3m of 180mm x 19mm non-treated pine, cedar or macrocarpa, 75mm x 75mm 2.4m long post, 60mm piece of doweling, quick-set concrete. Use our bird outline as a stencil.
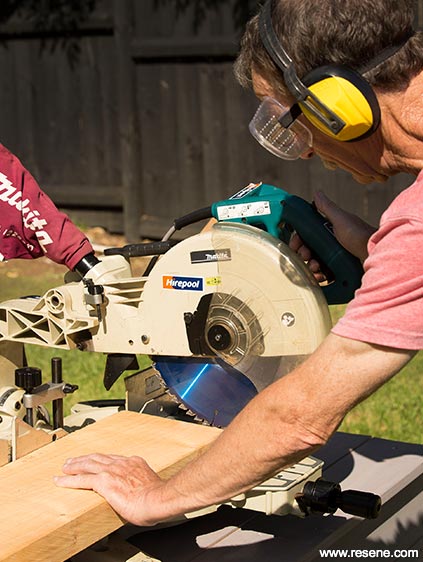
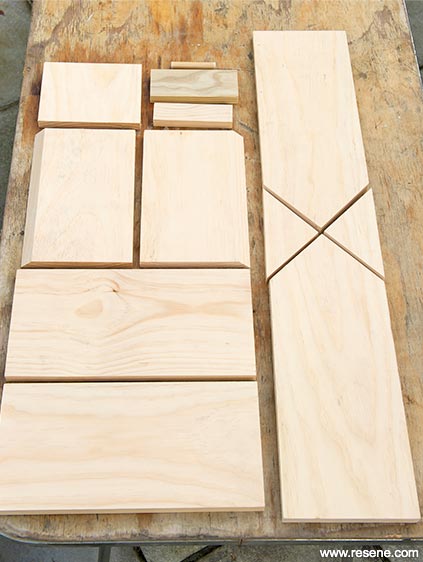
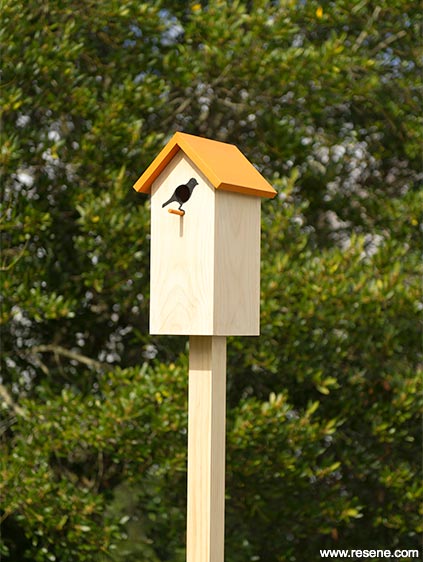
Step 1: Cut out the pieces for the birdhouse, using the full plank width. The 180mm x 270mm roof pieces have a 45-degree bevel on one long edge so they fit together to form a gable. Ours is made for starlings so measures 450mm high to the top of the gable, with 360mm high sides. The base measures 180mm x 140mm. Sand any rough edges or surfaces.
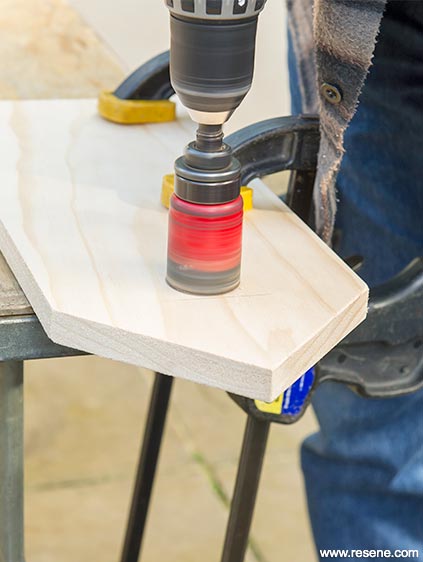
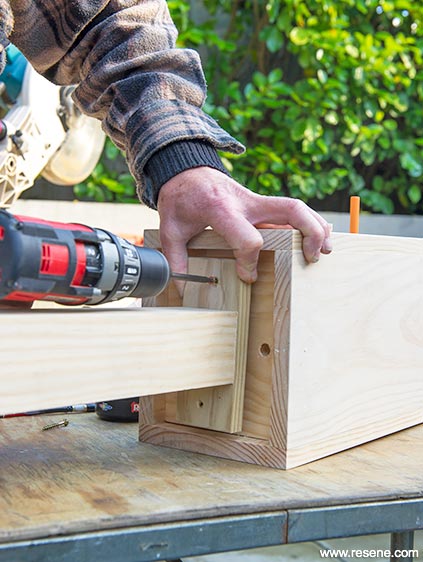
Step 2: Mark the hole in the centre of the front panel. Line the top up with the 45-degree gable angle. Drill a hole for the peg. Also drill a couple of drainage holes in the base piece of the birdhouse.
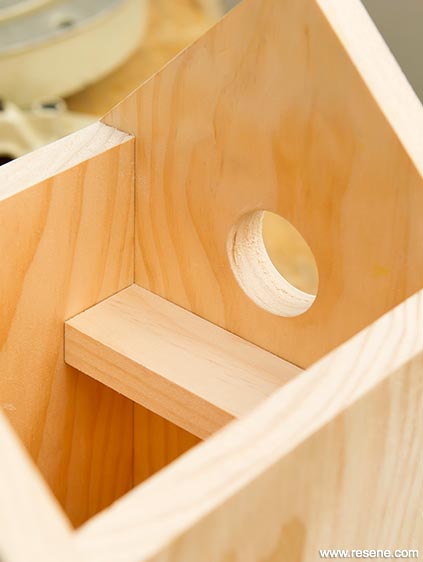
Step 3: Assemble the body of the birdhouse, nailing the front and one side together. Attach the base and the 40mm wide landing ledge inside, then add the second side and the back.
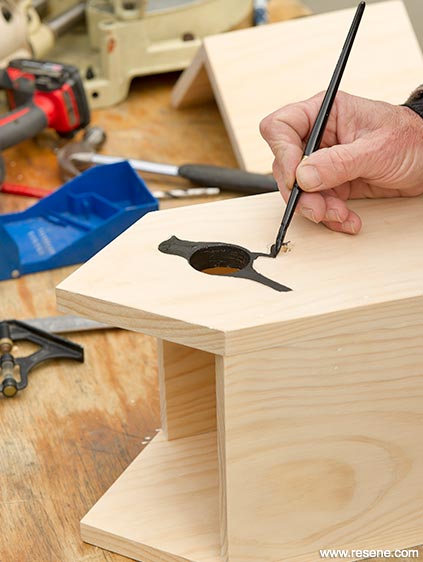
Step 4: Draw a bird shape around the hole with the foot ending on the peg and paint with Resene Black. Or you can jigsaw the shape instead. Paint the peg and insert it. Paint the roof, using a Resene testpot (which is fine for outdoor use). We used Resene Clockwork Orange. NB: You may prefer not to include a peg as many cavity nesting birds don't need them. If you live in the north, the peg may encourage predator birds like mynah.
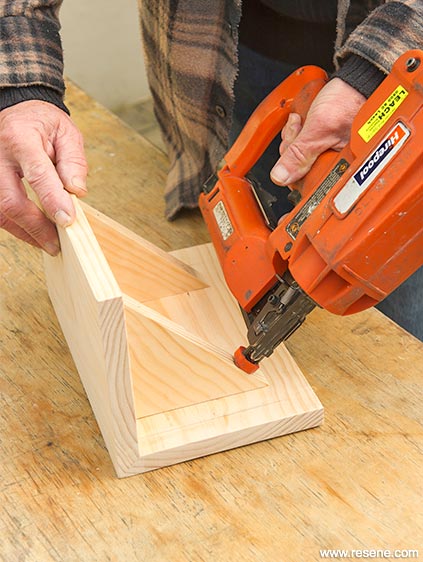
Step 5: Assemble the roof, spacing the struts so that they slip inside the body of the house. Fill nail holes if desired and lightly sand.
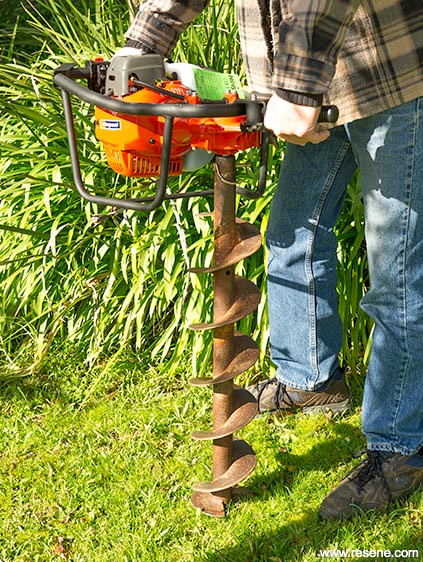
Step 6 : Attach the platform to the top of the pole. Bore or dig a hole and set the pole with quick-set concrete. Fill half of the birdhouse with dry wood shavings, moss or pine needles to give the birds a nesting start.
All equipment and expertise from Hirepool. Visit www.hirepool.co.nz or call 0800 15 15 15.
created by: Philippe Morin
pictures: Mark Heaslip
Search habitat magazine stories
Printed copies of habitat highlights are available from late March 2024 at Resene ColorShops and resellers, while stocks last. You can view back issues of habitat magazine online.
Specifiers:
If you have an idea, project or story that you think would suit habitat, we’d love to hear from you. Please drop us an email with your details and include photos if submitting a project.
Sign up for a DIY card and Save! Australia | New Zealand
![]() Get inspired ! Subscribe
Get inspired ! Subscribe ![]() Get saving ! Apply for a DIY card
Get saving ! Apply for a DIY card
![]()
Can't find what you're looking for? Ask us!
Company profile | Terms | Privacy policy | Quality and environmental policy | Health and safety policy
Colours shown on this website are a representation only. Please refer to the actual paint or product sample. Resene colour charts, testpots and samples are available for ordering online. See measurements/conversions for more details on how electronic colour values are achieved.
What's new | Specifiers | Painters | DIYers | Artists | Kids | Sitemap | Home | TOP ⇧


