Resene paint effects projects, project 21
Part 1 – Graining simulates wood grain using paints and effects finishes.
Use this technique where wood might normally have been used. In the majority of cases, it is best to use tones of the same colour. Usually the basecoat is lighter than the effects finish applied to the top. The table in this project has a laminate top in sound condition but it will need to be primed before graining.

Paint a wood grain effect on a table
Before you start your project try out different combinations and practice your application method on a piece of card until you are happy with the result. Resene FX Paint Effects Medium is available in 60ml testpots from your Resene ColorShop.
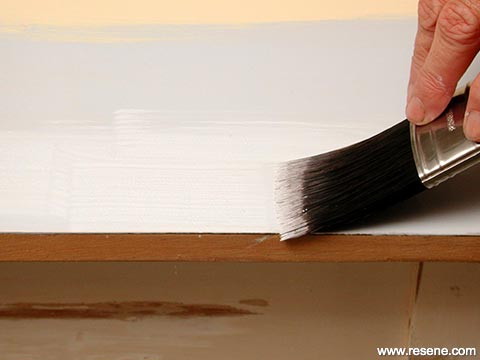
Step 1
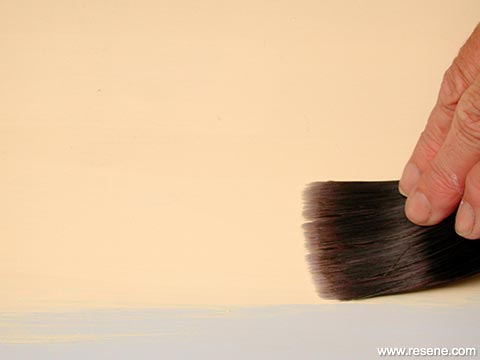
Step 2
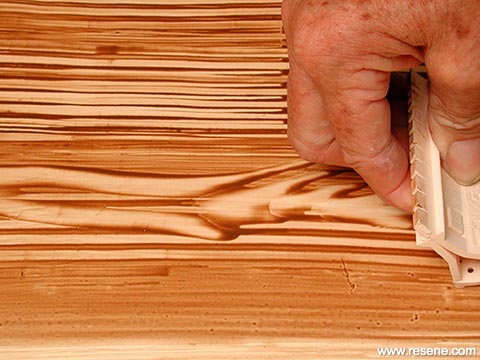
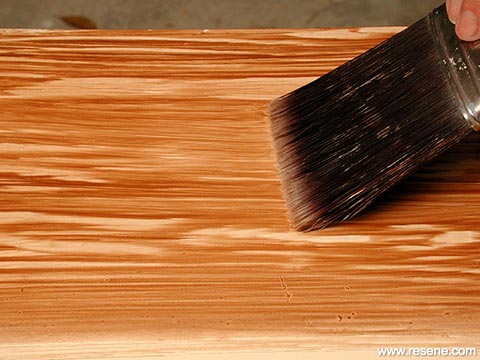
Combing
Step 1: Sand the top and edges of the table top to provide a key for the primer. Apply a liberal coat of Resene Waterborne Smooth Surface Sealer and allow to dry.
Step 2: Apply one to two coats of Resene Bavarian Cream. Leave to thoroughly dry.
Step 3: Mix the effects finish using Resene FX Paint Effects Medium and Resene Dark Rum. The proportions may vary depending on the look you want. The more Resene FX Paint Effects Medium used, the more transparent the effects finish. In this project equal amounts of the Resene FX Paint Effects Medium and the graining colour are used.
Combing: Brush the effects finish on in a lengthwise direction. Thin with water if it is too thick. Pull the graduated comb across the surface to create a lined effect. The lines don’t have to be perfectly straight – wood never is. Butt the next line up to the previous one.
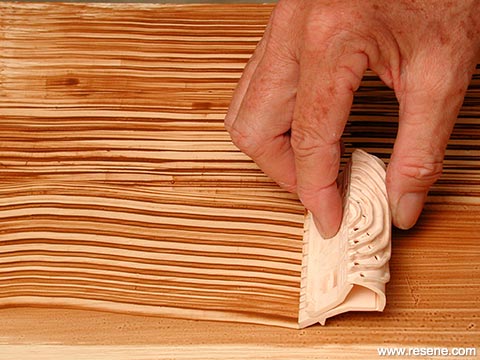
Step 4
Step 5
Step 4: Using the graining rocker. Pull the graining rocker down slowly, and rock it backwards and forwards as you move it down to create knots in the wood. Make the knots at random intervals.
Step 5: Soften the graining gently with a large soft brush.
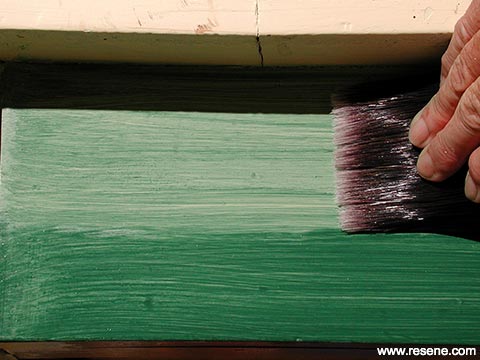
Part 2 – Dragging is literally dragging a dry brush over a wet effects finish to achieve a series of fine wood-like lines.
The coarseness of the brush will determine the final effect. More than one effects finish may be applied, and another coat or two in different tones of the same colour may add more interest. When doing a dragged finish, always follow the grain of the wood. For example, across the length of the table top, down the table legs and across the drawers.
Step 1: Sand the table base well and apply two coats of Resene Bavarian Cream.
Step 2: Mix up the effects finish using approximately equal amounts of Resene FX Paint Effects Medium and Resene Bush. Thin with a little water if too thick. Test on an area first to see if the mix needs adjusting.
Work on one section at a time. Brush on the effects finish. Hold the dragging brush near the ferrule and apply a bit of pressure. Drag down the paint, as straight as you can, in one long, unbroken motion. Wipe excess paint off the brush after each strip is completed.
› Download this project as a PDF
Project by Janet Scard. Photography by Joseph Zou.
![]() Get inspired ! Subscribe
Get inspired ! Subscribe ![]() Get saving ! Apply for a DIY card
Get saving ! Apply for a DIY card
![]()
Can't find what you're looking for? Ask us!
Company profile | Terms | Privacy policy | Quality and environmental policy | Health and safety policy
Colours shown on this website are a representation only. Please refer to the actual paint or product sample. Resene colour charts, testpots and samples are available for ordering online. See measurements/conversions for more details on how electronic colour values are achieved.
What's new | Specifiers | Painters | DIYers | Artists | Kids | Sitemap | Home | TOP ⇧


