Resene DIY project #9
How to paint like a professional - training videos and project sheets
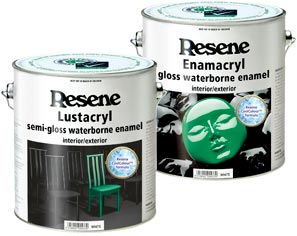
Painting exterior windows using Resene Lustacryl or Resene Enamacryl waterborne enamels
| View video |
With the exception of new windows, treat moss and mould using Resene Moss & Mould Killer (see Data Sheet D80). This is best applied with a knapsack garden sprayer. Care should be taken to avoid plants etc.
Wash and scrub using Resene Paint Prep and Housewash (see Data Sheet D812) to dechalk and remove any contaminants including mould residue. We recommend wearing protective gloves and using a 3M scouring pad. Rinse with fresh water.
Do not waterblast as this will damage the timber and risk cracking the glass.
Scrape and sand any flaked or unsound paint using 100-220 grit sandpaper. Depending on the degree of sanding required, a linbide scraper and/or 35-50mm flat bladed scraper may also be needed – if necessary replace glazing putty.
Prime or spot prime with either Resene Quick Dry primer (see Data Sheet D45) or Resene Wood Primer (see Data Sheet D40).
Note 1: With the notable exception of Resene True-Prime, the manufacturers of the primers used to pre-prime new timber in New Zealand and Australia require that the timber is sanded and re-primed with a solventborne primer such as Resene Wood Primer. Pre-primers are thin holding primers and designed to provide only temporary protection during the building process.
They should not be considered part of the coating system.
Note 2: Unfortunately most are so poorly bound together that unless the primer is sanded off completely, a solventborne primer (as opposed to a waterborne primer like Resene Quick Dry (see Data Sheet D45) will be needed to help stabilise the pre-primer and ensure a good base for future topcoats. Most paint failures on new exterior timber are due to the poor quality of these pre-primers.
As noted the exception is Resene True-Prime which was developed specifically to overcome the issue identified above. It is blue in colour but unfortunately that has been copied, so the only true indicator is if the required identification sticker has been left on site.
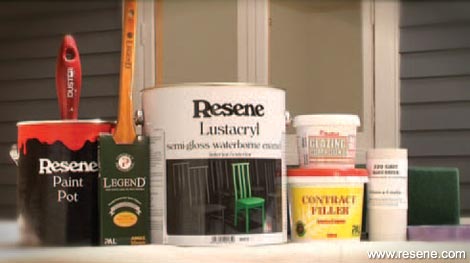
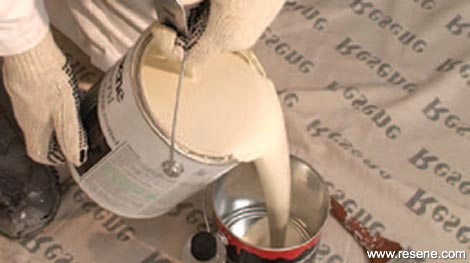
Stir the paint thoroughly using a flat bladed stirrer and decant approximately half a litre of paint into a paint pot. Except on the coldest days, add up to 5% Resene Hot Weather Additive.
The key to a top quality finish is to use a good quality brush in a size you’re comfortable with. We recommend the PAL Legend 35 or 50mm cutting-in brush.
Please take the time to carefully read through the instructions on the label. More information, including Data Sheets for the Resene products mentioned and Safety Data Sheet/s (SDS) can be found on the Resene website.
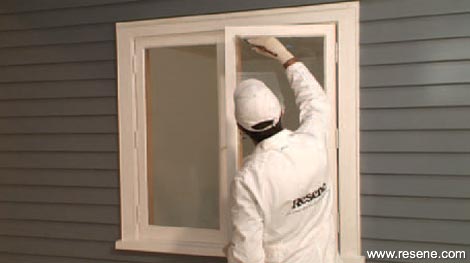
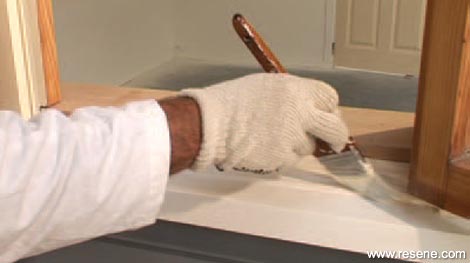
When painting windows it is important to plan your approach.
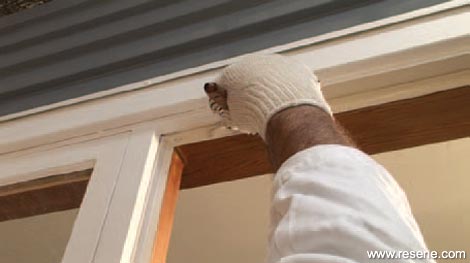
With all windows including the casement window shown, the rebates on the internal edges of the window and the frame are painted first.
Start with the top edge and move down to the hinged side of the window jamb – painting both the inside face of the frame and the window before completing the opposite side and bottom inside face of the frame.
Once completed start on the edges of the window itself. Wipe any excess paint from the interior aspect of the window using a clean rag or similar.
After completing the underside of the window close it to the last position on the latch and paint the window sash starting at the top rail before working around the window sash, painting the hinges and inside edge of the frame as well.
As waterborne enamels dry faster than solventborne enamels it is important to paint in the same direction around the window using the timber joins as a natural overlap.
If the frame and the sill are being painted in a contrast colour this edge and the rest of the frame should be completed after the window and the inside edges have dried and it can be closed completely.
The hinges are usually painted in the same colour as the window frame.
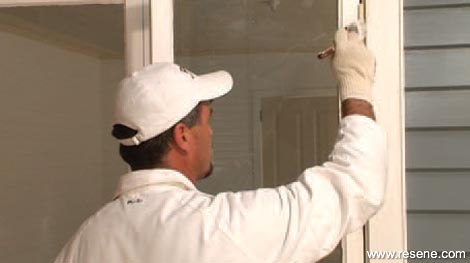
Next paint the top rail of the sash starting with the puttied edge – bringing the paint out over the putty and onto the glass by 1mm.
Once done paint the lower rail of the sash before starting on the hinged side and the leading edge of the window.
Finally paint the inside face of the window – this is done last as it is used as a handhold (support) by the painter.
Leave the window slightly ajar – usually on the last position of the latch and paint around the frame before finishing with the sill.

After completing the second sash using the same techniques and sequence paint the mullion rail.
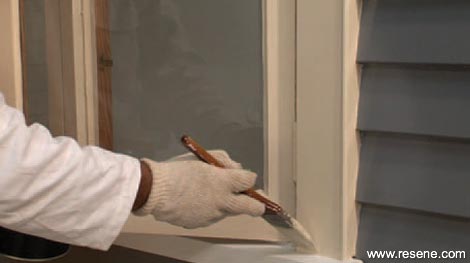
Next paint the scribers or outer edge of the frame.
It is best practice to paint the scribers on the weatherboard edge of the window frame in the same colour as the window as shown here.
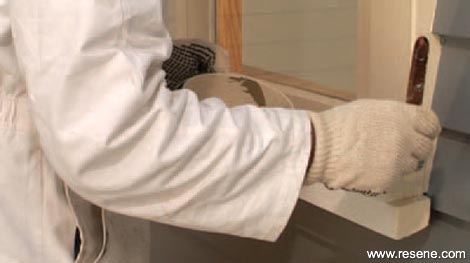
Now complete the window frame working around the window again using the timber joins as a natural overlap.
Once the frame is complete paint the windowsill. Allow three to four hours to dry before applying a second coat.
Allow three to four hours to dry before applying a second coat.
Try not to paint too late in the day to avoid dew settling and marking the paint. Leave the window slightly ajar for 24 hours before fully closing.
The availability of waterborne enamels has fundamentally changed painting and particularly so for exterior windows – if little preparation is needed then painting windows is easy and straightforward. If available we also recommend the use of a Resene CoolColour™ when using strong colours, for example on the windowsill.
A quality Legend brush. We recommend the 50mm Legend cutting in brush.
Resene Hot Weather Additive. This is useful not only in warm, dry conditions but to improve the open time of waterborne enamels making brushing easier.
180 to 220 grit zinc sterate sandpaper. You will need to sand before painting especially hardened glossy paint that has not been exposed to U.V. light.
A paint pot. These are incredibly useful and much easier to paint from than direct from the can.
If you are painting a new window or if the window has exposed timber, you will also need to prime or spot prime with Resene Quick Dry primer (a solventborne primer such as Resene Wood Primer (see Data Sheet D40) or Resene Enamel Undercoat (see Data Sheet D44) should be used to seal timbers such as cedar that stain through waterborne primers).
You may need a filler for any dents or holes. We recommend Resene Ezyfill or PAL Contract Series filler for this purpose.
Resene Paint Prep and Housewash and a 3M pad. The cleaner is very effective at removing old paint residue called chalk as well as dirt and other contaminants.
A decent drop sheet(s), especially if other painting projects are planned (on the horizon).
A putty knife or similar for applying any filler.
Scrapers and coarser sandpaper if an old paint needs to be partially stripped (contact Resene if the window needs to be completely stripped).
Painter’s gloves – they are relatively inexpensive and save a lot of cleaning. They are also very useful for wiping any drips or along the sharp edge of the door.
› Download this project sheet as a PDF
Training Videos and Project Sheets
Learn how to prepare surfaces and apply paint to get the best from your paint finish with these handy videos and project sheets.
![]() Get inspired ! Subscribe
Get inspired ! Subscribe ![]() Get saving ! Apply for a DIY card
Get saving ! Apply for a DIY card
![]()
Can't find what you're looking for? Ask us!
Company profile | Terms | Privacy policy | Quality and environmental policy | Health and safety policy
Colours shown on this website are a representation only. Please refer to the actual paint or product sample. Resene colour charts, testpots and samples are available for ordering online. See measurements/conversions for more details on how electronic colour values are achieved.
What's new | Specifiers | Painters | DIYers | Artists | Kids | Sitemap | Home | TOP ⇧

