Projects from Your Weekend magazine
If you’re disorganised, you’re on notice. Sarah Withell has just the project for you.
As a busy mum, I’m constantly forgetting things because I haven’t written them down. In an effort to get more organised, this month’s project is a stylish noticeboard (two, to be exact) for a kitchen or home office. The best thing about these noticeboards is that they are painted in blackboard paint, so they are perfect for scribbling and erasing all your lists.
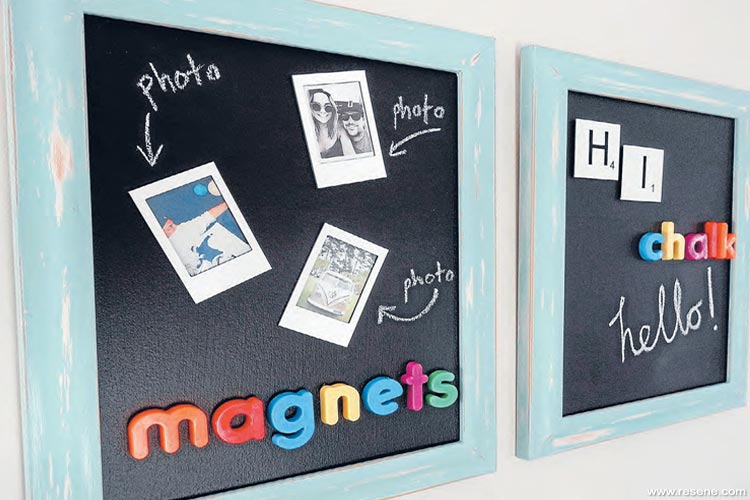
Even better, I loaded them up underneath with hard-working magnetic paint too, so you can add magnets to hold receipts and photos or create your own noticeboard works of art. As well as functional, they are a bit more fashionable than your average stationery-store noticeboard too, thanks to the shabby-chic paint finish that is very easy to achieve. This project can be comfortably completed over a weekend, so you can have them up on the wall in time for the start of a new week.
For this project you will need
Step one
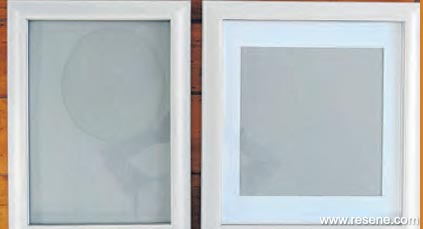
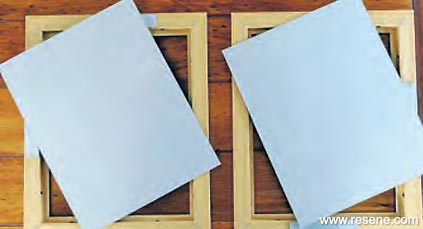
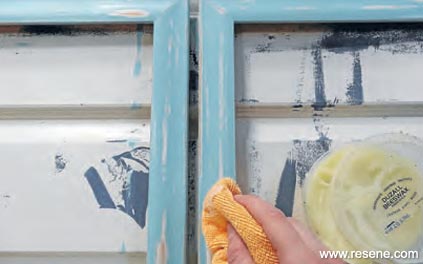
Take your frames apart, removing the glass and matt board. Keep the frame and the hard backing board to work with. Start by giving your frames a light sand to prepare them for painting. If your frames are not made of timber, apply a coat of Smooth Surface Sealer.
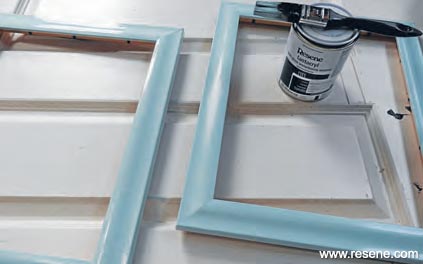
Step two
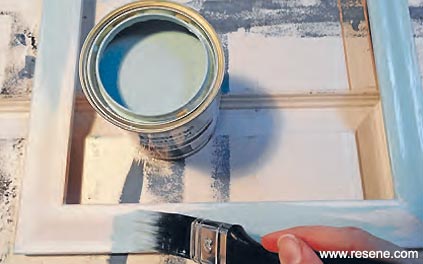
Apply the paint colour to your frames using a paintbrush. I chose Sea Foam. Pastel-based colours work best when going for a vintage look. Don’t worry about achieving a perfect finish, since you will be scuffing it up later. You will need to apply two coats.
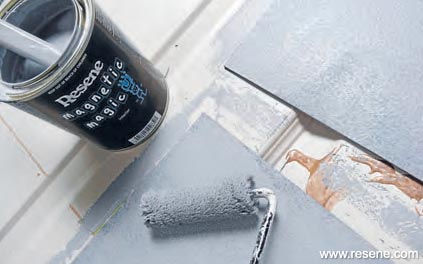
Step three
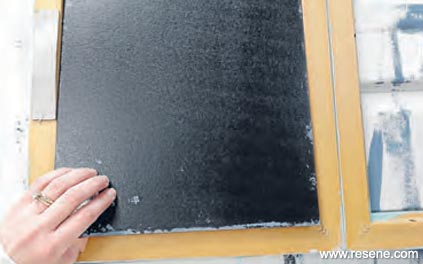
While your frames are drying, apply two to three generous coats of magnetic paint to your backing boards. The more coats you apply, the stronger the magnetic effect will be. You can use a roller or paintbrush for this; I used both and got a nice finish either way. (Tip: make sure to shake and then stir the paint well to evenly distribute all the metal particles that may have sunk to the bottom of the can).
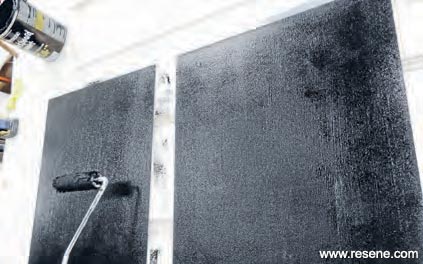
Step four
Once you have painted all your layers of magnetic paint and it has dried completely, roll on your blackboard paint. Apply two coats.
Step five
Apply the paint colour to your frames using a paintbrush. I chose Sea Foam. Pastel-based colours work best when going for a vintage look. Don’t worry about achieving a perfect finish, since you will be scuffing it up later. You will need to apply two coats.
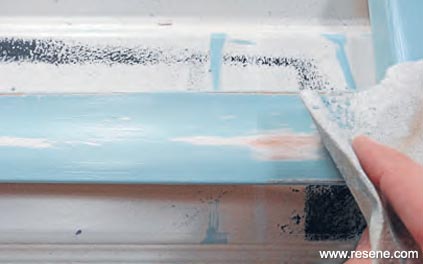
Step six
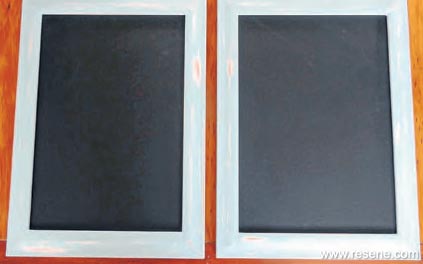
Place the backing boards back into the frames, then hang them up on the wall and go crazy with chalk and magnets! You could even create a chalk work of art, and protect it by returning the original glass to the frame. Memo board or work of art, it’s up to you!
Words and pictures by Sarah Withell. 2015
▸ Download a PDF of this article
Projects from Your Weekend magazine
View more project ideas from Your Weekend magazine in the Resene weekend DIY projects section.
![]() Get inspired ! Subscribe
Get inspired ! Subscribe ![]() Get saving ! Apply for a DIY card
Get saving ! Apply for a DIY card
![]()
Can't find what you're looking for? Ask us!
Company profile | Terms | Privacy policy | Quality and environmental policy | Health and safety policy
Colours shown on this website are a representation only. Please refer to the actual paint or product sample. Resene colour charts, testpots and samples are available for ordering online. See measurements/conversions for more details on how electronic colour values are achieved.
What's new | Specifiers | Painters | DIYers | Artists | Kids | Sitemap | Home | TOP ⇧

