Projects from Your Weekend magazine
Make a bold statement in your home with marquee letters, says Sarah Withell.
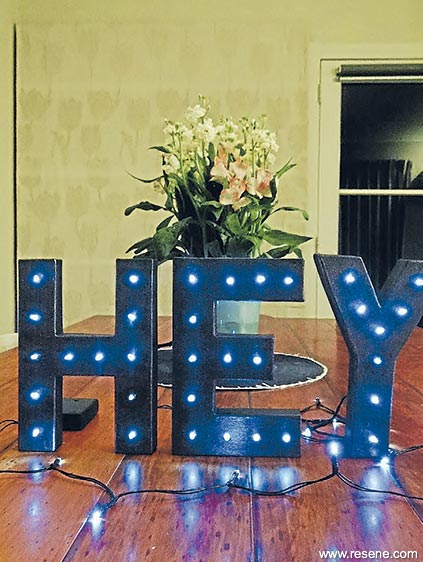
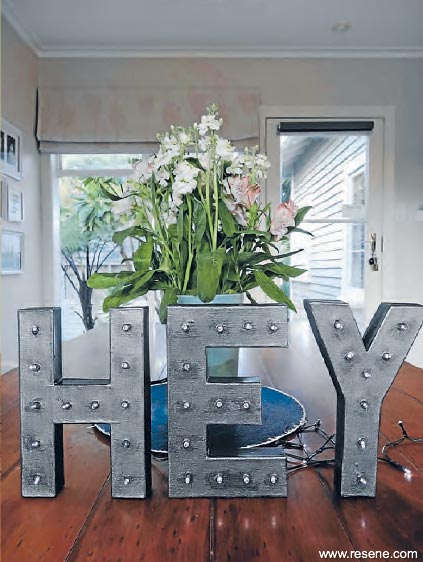
Typography prints and decorative letters are still trending and aren’t showing any signs of going away soon. The latest take on this craze is marquee letters. Basically, these are large 3D letters that contain string lights, giving you a cool neon-sign effect in your own home. Marquee letters can be bought ready-made in all sorts of materials, shapes and symbols but can be expensive. I decided to give them a go myself and show you how easy it can be to make your own, personalised light-up letters. Even better than one letter or symbol alone, I tackled a whole word. The hardest part is choosing one.
For this project you will need
Handy hint
Store-bought marquee letters often need to be plugged in to a power supply, making placement in the home a bit more limited. Battery-powered string lights eliminate this problem, meaning you can move your sign around easily.
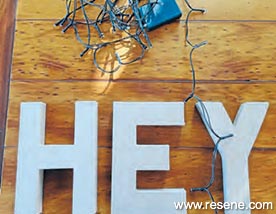 Step one
 Step two
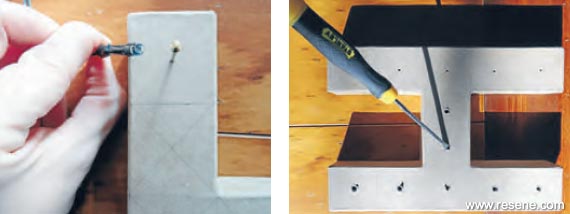 Step three
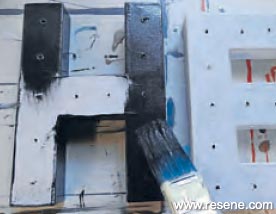 Step four
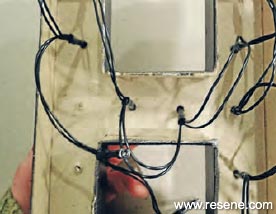 Step five
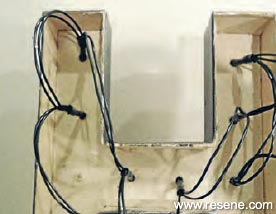 Step six
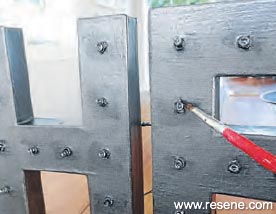 Step seven
Words and pictures by Sarah Withell. 2015
▸ Download a PDF of this article
Projects from Your Weekend magazine
View more project ideas from Your Weekend magazine in the Resene weekend DIY projects section.
![]() Get inspired ! Subscribe
Get inspired ! Subscribe ![]() Get saving ! Apply for a DIY card
Get saving ! Apply for a DIY card
![]()
Can't find what you're looking for? Ask us!
Company profile | Terms | Privacy policy | Quality and environmental policy | Health and safety policy
Colours shown on this website are a representation only. Please refer to the actual paint or product sample. Resene colour charts, testpots and samples are available for ordering online. See measurements/conversions for more details on how electronic colour values are achieved.
What's new | Specifiers | Painters | DIYers | Artists | Kids | Sitemap | Home | TOP ⇧