Sustainable ideas ❋ Te oranga ō te taiao, from Thrive magazine
Stylist Savannah Betti transforms a simple bookcase into a stylish seat with heaps of extra storage.
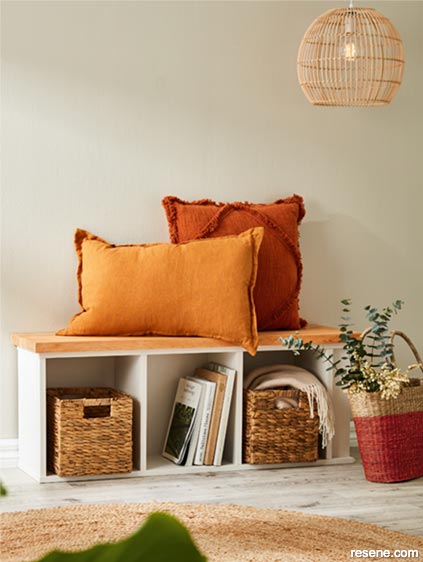
Build a bench seat, add woven baskets, dress with cushions and throws, and enjoy!
Materials and tools:
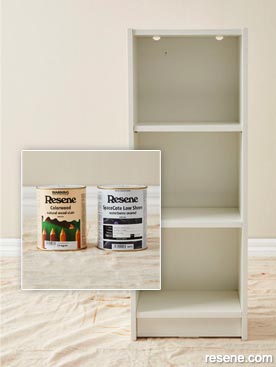
Resene products:
Resene colours:
Place the bookshelf on its side. Measure the length and width for a panel for the top, so it is slightly larger than the bookcase. It’s easiest to ask a timber supplier to cut the pine panel to size for you.
If the bookshelves are adjustable, arrange them in the positions you want so the baskets will fit. Drill holes and use screws to fix the shelves into place. (A) Use Resene EzyFill Quick to fill any screw holes or blemishes. (B) Leave to dry.
 You will need
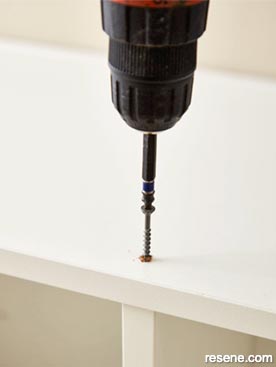 Photo (A)
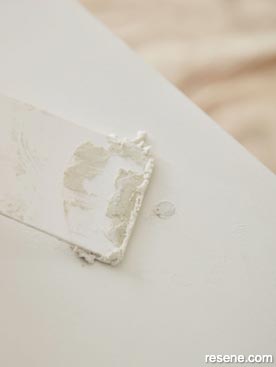 Photo (B)
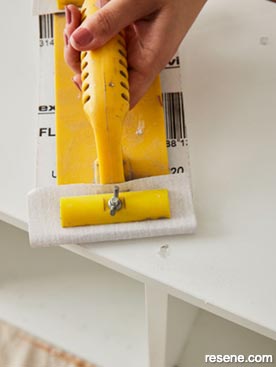 Photo (C)
Sand the entire bookshelf to prepare it for painting. Ensure any filled areas have been sanded, so they are smooth. Clean any excess dust away. (C)
Using Resene SpaceCote Low Sheen in Resene White Linen, apply the first coat to the bookcase. (D, E) When it’s completely dry, apply a second coat.
While the shelf is drying, prepare the pine panel for staining. Using a damp cloth, lightly wet the surface of the wood. Take another paint brush and dip it into Resene Colorwood wood stain in Resene Oregon. (F) Spread evenly and wipe off any excess with a paper towel or clean cloth. Leave to dry. Repeat this process until you have reached the desired stain colour.
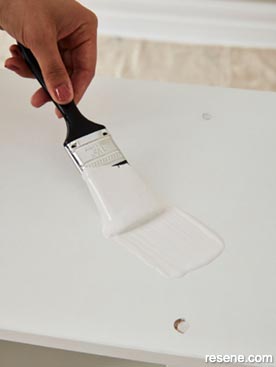 Photo (D)
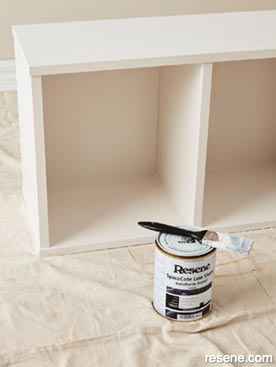 Photo (E)
 Photo (F)
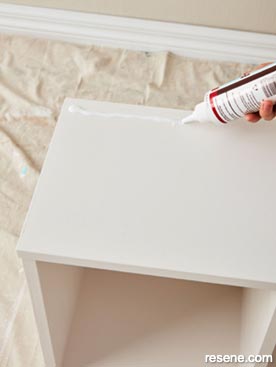 Photo (G)
Using approximately 40mm screws, drill holes from inside the bookshelf, so that you can screw the panel on from inside the bookshelf. This will secure the panel without ruining the finish on the top of the bench seat. Note: Ensure the screws are shorter than the thickness of the pine panel and bookshelf combined. (J, K)
Add the woven baskets, dress with cushions and throws, and enjoy!
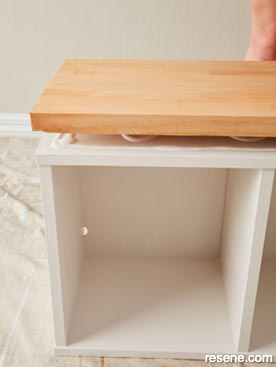 Photo (H)
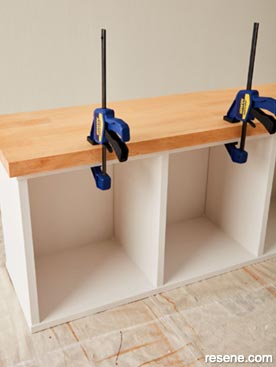 Photo (I)
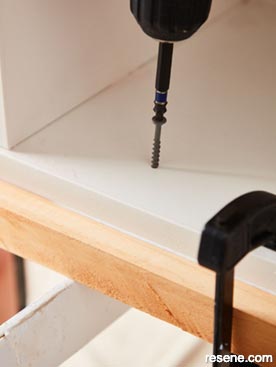 Photo (J)
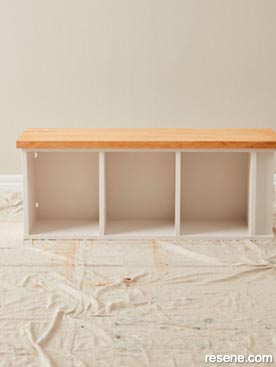 Photo (K)
› Download this project as a PDF
Project by Savannah Betti. Photography by Michael Moore. December/January 2021
Projects from Thrive magazine
Thrive features authentic information on sustainability, mind and body health, garden-to-table living, eco beauty and fashion...
![]() Get inspired ! Subscribe
Get inspired ! Subscribe ![]() Get saving ! Apply for a DIY card
Get saving ! Apply for a DIY card
![]()
Can't find what you're looking for? Ask us!
Company profile | Terms | Privacy policy | Quality and environmental policy | Health and safety policy
Colours shown on this website are a representation only. Please refer to the actual paint or product sample. Resene colour charts, testpots and samples are available for ordering online. See measurements/conversions for more details on how electronic colour values are achieved.
What's new | Specifiers | Painters | DIYers | Artists | Kids | Sitemap | Home | TOP ⇧