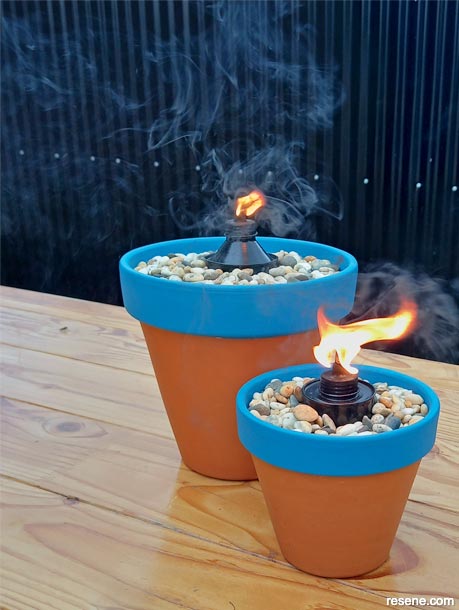
DIY project from NZ Gardener magazine
This is a great way to keep the mosquitoes and bugs away, and create some mood lighting as the nights start to close in.
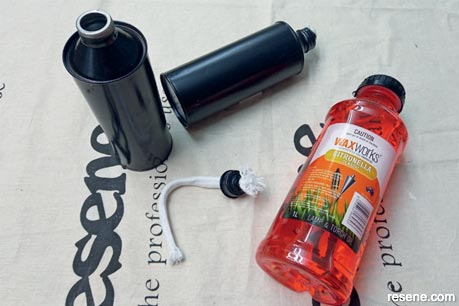
Materials:
Tools:
Cost: $40 (this excludes Resene products. I used Resene Bowie).
Top tip: Make sure you coat your pot inside and out with Resene Aquapel & Terracotta Sealer being you paint. This helps stop the water from the inside blistering off paint on the outside.
Learn how to make a tabletop tiki torch:
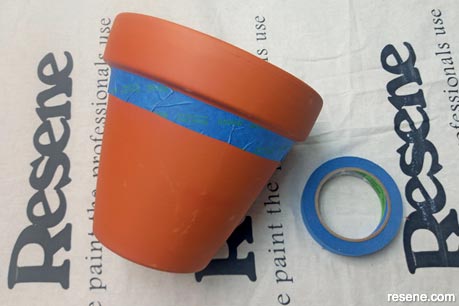 Step 1
Using the masking tape, mask off around the top of the pot.
 Step 2
Prime with Resene Quick Dry Waterborne Primer Undercoat. Remember to go over the edge and into the inside of the pot.
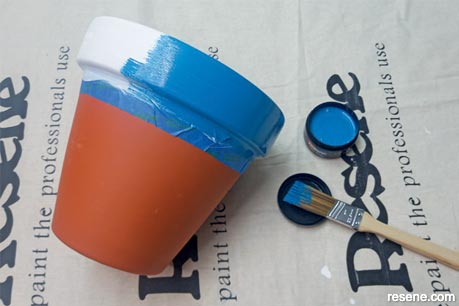 Step 3
Paint with your favourite Resene colour. I have chosen Resene Bowie to contrast with the colour of the terracotta. Once painted, remove the masking tape.
 Step 4
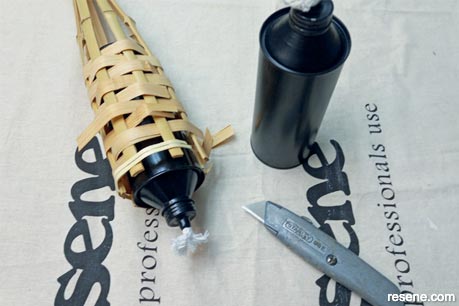
If you can’t find the tiki torch cannisters, you can remove one from a tiki torch bamboo stake using a utility knife, and keep the bamboo for another garden project. This project also presents an opportunity to repurpose old weathered tiki torch stakes, by removing the oil cannister and making a tabletop version instead.
 Step 5
Fill the cannister to three-quarters full with oil. I used citronella to help keep the mosquitoes and bugs away.
 Step 6
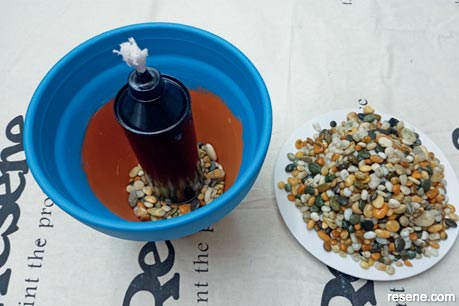
Wash the decorative stones if required. Fill with the bottom of the terracotta pot with enough stones for the oil cannister to sit level with the top of the pot. Carefully place the cannister on the centre of the stones. The top of the cannister should be above the line of the top of the pot.
 Step 7
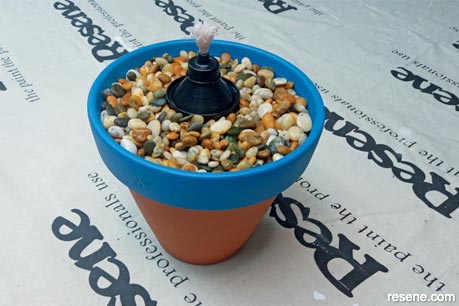
Fill around the edges with the decorative stones. Your tabletop tiki torch is now ready to place in your garden or outdoor entertainment area.
 Step 8
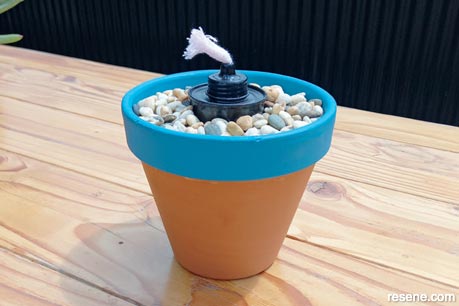
A close-up of the finished torch project (unlit).
Project by: Jane Horne
Jane Horne and partner Simon Bartholomew design and develop projects from their studio in Christchurch, managing projects throughout the South Island.
![]() Get inspired ! Subscribe
Get inspired ! Subscribe ![]() Get saving ! Apply for a DIY card
Get saving ! Apply for a DIY card
![]()
Can't find what you're looking for? Ask us!
Company profile | Terms | Privacy policy | Quality and environmental policy | Health and safety policy
Colours shown on this website are a representation only. Please refer to the actual paint or product sample. Resene colour charts, testpots and samples are available for ordering online. See measurements/conversions for more details on how electronic colour values are achieved.
What's new | Specifiers | Painters | DIYers | Artists | Kids | Sitemap | Home | TOP ⇧

