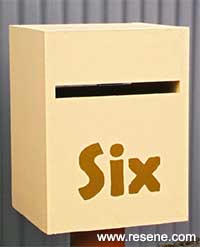
Mark Rayner shows how to keep your mail safe and dry with this simple but sturdy mailbox constructed from treated plywood.
You will need:
Here’s another idea: Mark painted the background corrugated iron fence with Resene Lumbersider tinted to Resene Birdcage
![]()
Step 1
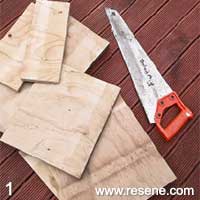
Measure, mark and cut the plywood to the dimensions listed above. Smooth any rough edges with sandpaper.
Step 2
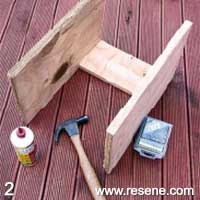
On a sturdy flat surface, attach the back upper section to the two side pieces, as shown, fixing with PVA glue and nails.
Step 3
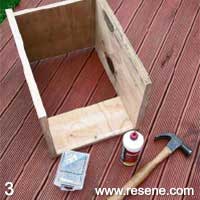
Attach the base to the two side pieces – the base should be positioned centrally along each side (leaving a 20mm gap at the front and back). Fix with PVA glue and nails.
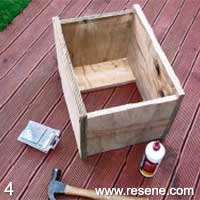
Step 4
Attach the top to the two side pieces (ensure it’s flush along each edge) and fix with PVA glue and nails.
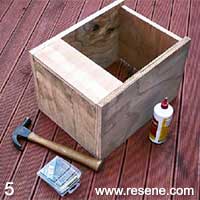
Step 5
Fix the front upper section into position with PVA glue and nails – again, ensure edges are flush.
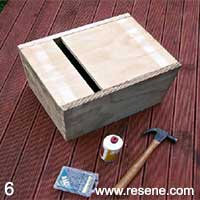
Step 6
Fix the front lower section into position, leaving a 30mm gap, as shown. Fix with PVA glue and nails.

Step 7
Fix the lower back section (door) into position, attaching with two hinges, as shown. Fix a catch along the bottom edge.
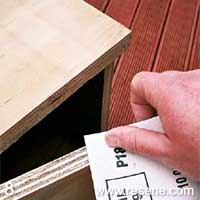
Step 8
Sand the edges of the hinged door if necessary, to ensure easy opening and closing once painted.
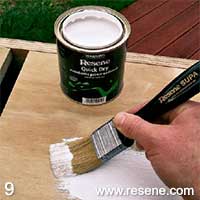
Step 9
Apply one coat of Resene Quick Dry to the entire mailbox (inside and outside) and allow two hours to dry.
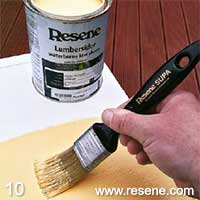
Step 10
Apply two coats of Resene La Luna to the entire mailbox (inside and outside), allowing two hours for each coat to dry.
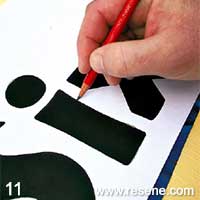
Step 11
Place the carbon paper face down on the front of the mailbox, position the house number on top, and trace around the outside of the lettering with a pencil.
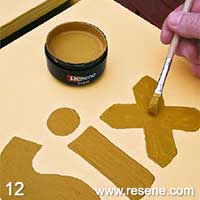
Step 12
Using a medium artist’s brush, paint in the lettering with two coats of Resene Zion, allowing two hours for each coat to dry.
![]() Get inspired ! Subscribe
Get inspired ! Subscribe ![]() Get saving ! Apply for a DIY card
Get saving ! Apply for a DIY card
![]()
Can't find what you're looking for? Ask us!
Company profile | Terms | Privacy policy | Quality and environmental policy | Health and safety policy
Colours shown on this website are a representation only. Please refer to the actual paint or product sample. Resene colour charts, testpots and samples are available for ordering online. See measurements/conversions for more details on how electronic colour values are achieved.
What's new | Specifiers | Painters | DIYers | Artists | Kids | Sitemap | Home | TOP ⇧