Having a place to practice or jam with friends or bandmates and listen to the works of other artists is just as important as a painter having a studio to paint in, a yogi having a space to spread out a mat and meditate or a seamstress having a room to sew.
For musicians, from amateurs through to professionals, music can be an all-consuming hobby. Having a place to practice or jam with friends or bandmates and listen to the works of other artists is just as important as a painter having a studio to paint in, a yogi having a space to spread out a mat and meditate or a seamstress having a room to sew. And there’s nothing stopping you from making one that celebrates the joy that music brings to your life.
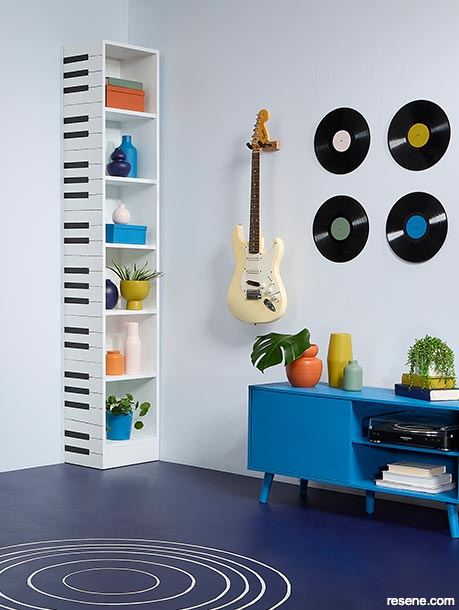


Mastering an instrument is all about practice, practice, practice and having a special space especially set aside to put in your time on the strings or keys makes it much easier to make practicing part of your everyday routine. Thanks to the fun and funky décor in this music corner, the area becomes a sacred space dedicated to the craft. Even if space is premium in your home, bringing a touch of energetic colour and musical motifs to a part of a shared room can be made possible with a bit of Resene paint and creativity.
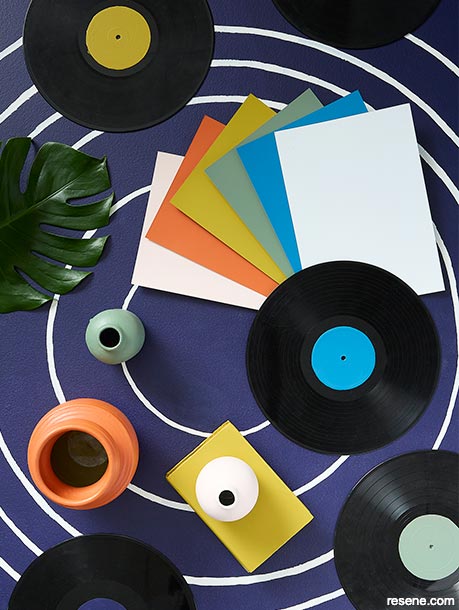
Walls in Resene Zircon, a pale crystalline blue, would look just as fitting in an elegant lounge as they do in this music corner. This quiet colour, anchored with a deep indigo floor painted in Resene Walk-on flooring and paving paint tinted to Resene Bullitt, makes a recessive base that’s flexible enough that it can be layered with a symphony of eye-catching statement colours. To infuse the corner with energy and creativity, we've added accents in six bold hues, Resene Dust Storm, Resene Lemon Ginger, Resene Half Rivergum, Resene Bullitt, Resene Matisse and Resene Vesuvius.
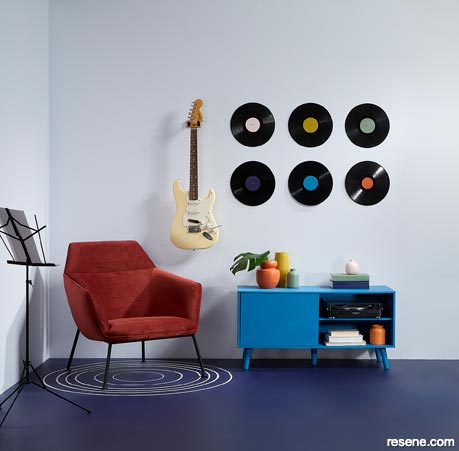
For a bit of fun, we've added a few literal nods to music to the décor. Old records from an op shop that have long been too scratched up to listen to become artwork. We painted over the labels of six records using Resene testpots, with each one being treated to two coats in a different accent hue. And thanks to the hole in the centre, hanging them on the wall becomes easy with a nail or screw.
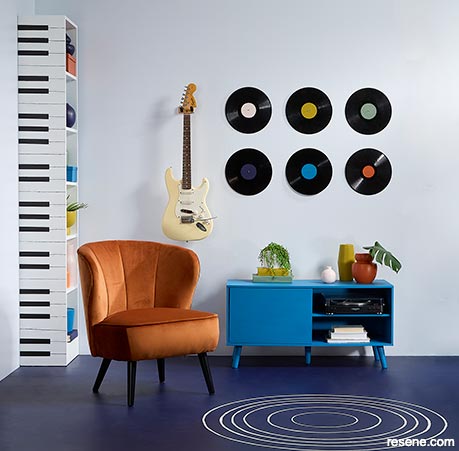
The side of a tall and narrow bookcase, which was first painted in Resene Alabaster, was given a cute piano treatment with some simple measuring and masking before using Resene All Black to create the effect of a keyboard. By painting a few storage boxes in our selected accent hues, you’ll have plenty of safe places to tuck away extra picks, strings, sheet music as well as ticket stubs or memorability from favourite live shows. To fill the rest of the space, we have painted a series of vases, plant pots, books and other decorative items to round out the palette.
To make long hours of practicing a comfortable experience, we added a particularly cushy velvet statement chair. When you go to choose a practice chair, be sure to select one with wide arms or no arms at all to give yourself lots of space move freely. And to give this special throne the honour it deserves, we've visually framed it with soundwave-inspired floor design by painting concentric circles in Resene Alabaster. To create the same idea at home, first tie one end of the string to a short pencil. Once you determine where the visual centre of where your armchair will sit is, apply a small piece of masking tape to the floor and mark it with the pencil. Tie the other end of the string to a pin and use it to anchor that end to the mark you drew on the floor. With a taut string, move your pencil around in a circle. To make larger circles, tie the string longer. To make smaller ones, shorten the string. Once all your ‘soundwaves’ have been marked out, use a small flat artist brush to paint you’re your pencil lines in two coats.
From there, a music stand, some sound equipment and a properly-anchored wall hook are all you need to set the stage for practice and appreciation.
Have a special spot where you like to rock out? Visually frame your favourite armchair with a soundwave-inspired floor design in your jam space.
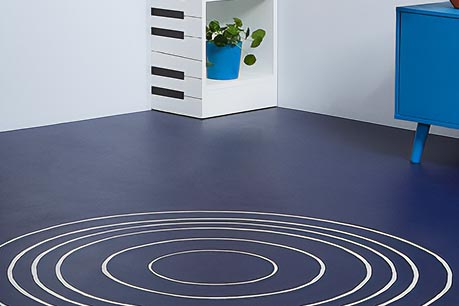
Start by painting 2 basecoats in Resene Walk-on flooring paint tinted to your colour of choice. We used Resene Bullitt, a fast paced deep blue with a base of purple black for a fun and energetic retro look.
Once your painted floor has dried fully, return your armchair to its place of honour and use a few tiny pieces of masking tape to mark where its outer corners reach. Move your chair back to a safe, clean place for the remainder of your project.
Use your masking marks to find the approximate centre of your chair. Using the pin and string method, use a chalk pencil to mark five to eight concentric circles, making the largest one slightly bigger than the size of your chair. You can do this by anchoring one end of the string to the floor in the spot you determined was the centre. Tie your chalk pencil to the other end of the string. The length of string will be the radius of your widest circle. While pulling the pencil tight on the string, draw your first circle. If the string was kept taught, the circle should come out perfectly. Re-tie your chalk pencil a few centimetres shorter on the string and draw another circle. Repeat until you’re happy with the number and position of your circles.
Using a small round artist’s and a steady hand, work slowly to paint the rings of your ‘soundwave’ using a testpot of Resene Alabaster in a single thick coat. Keep a damp cloth nearby for any drips or slips, and touch up any using a fine brush and a testpot of Resene Bullitt.
While there may be 88 keys on a real piano, it doesn't take the full keyboard for this painted design to take on the effect. We got the look with 48, but depending on the height and depth of your bookcase, you may want to paint more or less keys so that they appear at a convincing scale.
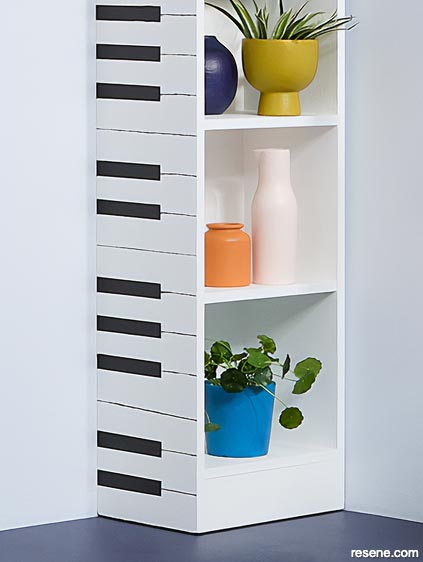
First, paint your bookcase in two coats of Resene Lustacryl semi-gloss waterborne enamel tinted to Resene Alabaster or another favourite Resene white of your choice. Allow your first coat to dry fully before applying the second.
Next, measure the height of your bookcase. Figure out how many white keys you would like your piano to have (preferably a number divisible by seven, so that you don’t end up with any partial scales), then divide your measurement by that number. Use a ruler and a pencil to mark equal increments along the front and back edge of your bookcase all the way up and use a straight edge to connect your marks horizontally.
Your black keys will rest centred in between most of your white keys, with one black key ‘missing’ following a 2-3-2-3 pattern. The vertical ‘width’ of these black keys should be approximately half that of the white keys, and they should only be approximately 2/3 as long. Use a ruler, pencil and straight edge to mark their placement along the back edge of your bookcase. Then, use high-quality painter’s tape to mask along the outside edges of each black key. Paint these masked areas in two coats using a testpot of Resene All Black.
Once your black keys have dried, use a small artist’s brush to paint the lines in between your white keys using a testpot of Resene All Black.
Styling by Laura Lynn Johnston. Photography by Bryce Carleton. 2022
Colour inspiration - latest looks gallery
Get inspired with colour and the latest decorating and colour trends! Select just the right look and mood for your space.
Filter: kids & teens | greens | blues | yellows | neutrals | oranges/browns | pinks/reds | greys/blacks | violets | pops-of-colour/multi-colour
More is more
Maximalism can be used to showcase your riches
Hamptons living
A sophisticated yet beachy vibe