Craft - inspired by Resene, from Little Treasures magazine
Any house with kids will be frantic at the best of times. Make life easier – and brighter – by creating your family’s own organising corner.

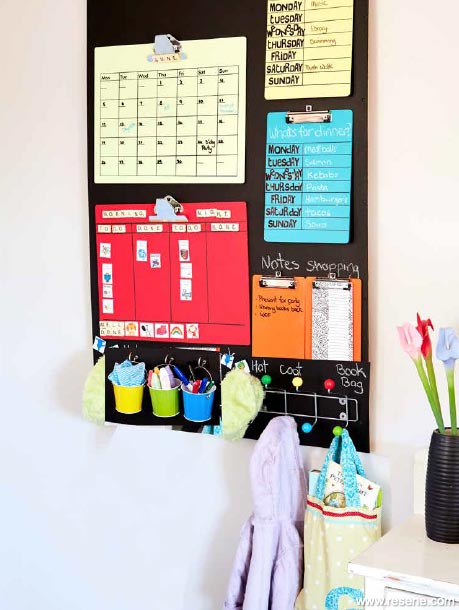
Getting the family organised can be more fun than you think. Creating a giant task board that doubles as a central place to hang bags, coats and hats saves time when you’re busy trying to get out the door to the day’s activities. Use our organiser as a guide to make one that works specifically for your family’s needs.

Mask off a section of wall and paint with Resene Magnetic Magic paint. You will need to paint two to three coats, leaving to dry between coats. Check your magnets stick well. If not, apply more magnetic paint or choose stronger magnets.
Paint two coats of Resene Blackboard Paint over the top of the Resene Magnetic Magic paint, leaving to dry between coats. Remove masking tape.
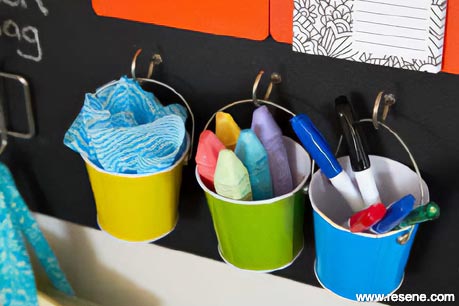
Mark out where your clipboards, hooks and buckets will go and use screws to attach hooks, screw in cup hooks for buckets and use nails or screws to hang clipboards.
Fill buckets with chalk, whiteboard pens and a cloth. Write on the blackboard background and use as a place to store magnets yet to be used.
Paint an A3 clipboard in two coats of your favourite Resene colour (we used Resene Sherbert).
When dry, mark out the grid and number lines with a pencil and then with permanent marker. Start the grid 2cm in from each side and up from the bottom, then mark seven boxes, 6cm in size horizontally and five boxes, 5cm in size vertically. And another set of seven boxes 2cm high by 6cm across for the days of the week. Use our image as a guide (far left).
Use small sticker letters to write the days of the week at the top of the grid.
Follow instructions for combining the two pots of Resene Write-On Wall Paint. Apply two coats; leaving to dry between coats.
Use a whiteboard pen to write the numbers of days on the calendar and Scrabble pieces with magnets to spell out the month on the metal clip of the clipboard or write with a whiteboard pen.

Paint an A3 clipboard in two coats of Resene Magnetic Magic, followed by two topcoats of Resene SpaceCote Low Sheen Paint (we used Resene Candy Floss).
Draw with a permanent marker lines to divide the board into ‘morning’ and ‘night’ and ‘to do’ and ‘done’. Measure and draw a horizontal line 5cm from the top and another one perpendicular 2.5cm down from the first. Then measure 5cm up from the bottom and draw another horizontal line. Divide the board in half approximately 23cm and draw a vertical line connecting the bottom and top lines. Repeat this to the left and right so your board is divided into quarters and you have three drawn lines and four rectangular boxes.
Attach magnets to the back of old Scrabble pieces with a glue gun and use to spell out words on the board.
Print images to represent task activities such as ‘Brush Teeth’. Cut out and laminate, glue a magnet to the back and let your children move them from ‘to do’ to ‘done’ morning and night. Reward them with a magnetic image, one for each day of the week that they complete all their tasks.
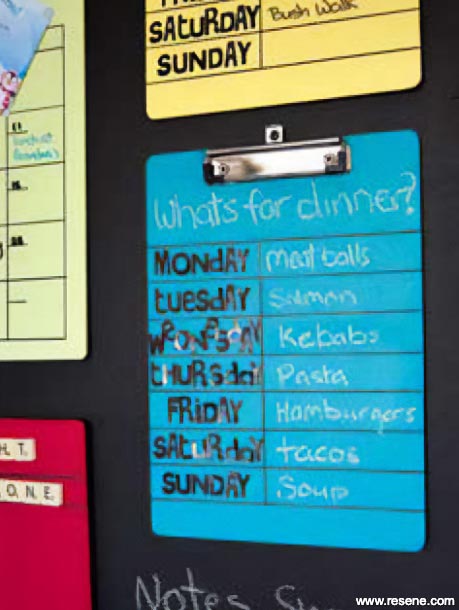
Paint an A4 clipboard with two coats of Resene SpaceCote Low Sheen paint (we used Resene Yabbadabbadoo).
Using our image as a guide, draw with a permanent marker lines to divide into days of the week and space to write ‘What’s for dinner?’. Measure 7.5cm down from the top of the clipboard and draw a horizontal line, then draw seven horizontal lines 3cm apart down the board. Measure 10cm from the left-hand side and draw a vertical line between the top and bottom horizontal lines.
Use sticker letters to write days of the week.
Paint A5 clipboards in two coats of your favourite Resene colour, using Resene SpaceCote Low Sheen paint (we used Resene Orang-atan).
On one of the clipboards paint with two coats of Resene Write-on Wall Paint, leaving to dry between coats.
Clip a shopping list pad to the board without whiteboard paint and use the whiteboard painted one for memos.
We used a roller to paint all our colours, magnetic, chalkboard and whiteboard paint to get a smooth finish. Buy a Resene testpot roller and tray and a packet of roller sleeves to make it easy to paint several different colours.
In between coats, wrap your roller in a plastic bag or clear wrap. This will help to keep the paint fresh in between coats or while you take a break.
To paint under the clip of the clipboard; open the clipboard clip and use a bulldog clip to hold the pieces of the clipboard clip open until the paint dries.
Create a clipboard for each family member and let them choose their favourite Resene colour for it. That way it will be easy to spot which board belongs to each person... and who hasn’t done all of their to do list!
For small children, write their list in pictures so they can learn to follow their list themselves. Then slowly introduce words and letters as they grow older.
Arrange the clipboards in order of height, so the ones the adults need are higher up and the ones the children need are lower down and they can reach them themselves.
Have a general doodling area so family members can write each other messages or draw pictures.
Keep the chalk out of reach when the board isn’t supervised – that way you won’t end up with everything covered in chalk or the chalk being eaten!
Keep the whiteboard markers positioned high enough so they are out of reach of young children.
You can colour co-ordinate types of activities and tasks – e.g. green might be used for sports activities, yellow for family, etc.
Created by Sarah Eberhardt.
Photography by Bryce Carleton.Kid's Bedroom Decorating Ideas
View more decorating ideas for kids from Little Treasures magazine in the Resene kid's bedroom inspiration gallery.