Habitat bright ideas with Fleur Thorpe – DIY projects
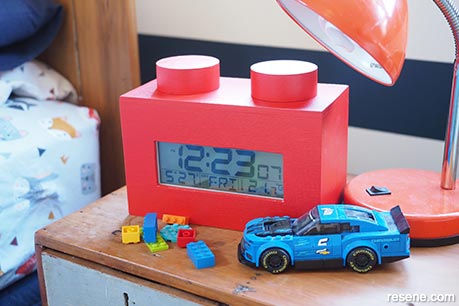
Make waking up time more enjoyable for your child with this Lego-inspired alarm clock.
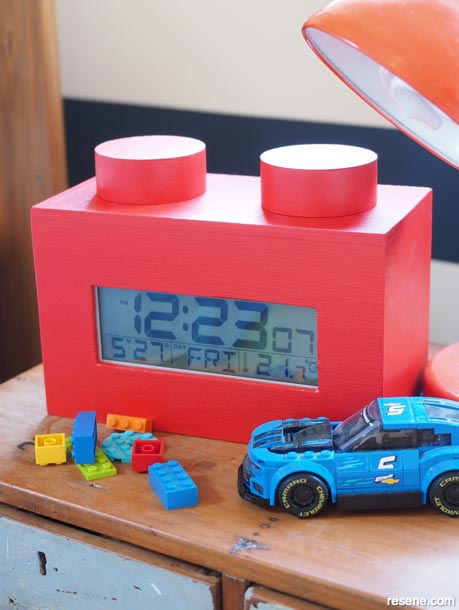
This Lego-inspired clock adds fun to any bedroom. The wall is painted in Resene Eighth Canterbury Clay and Resene Dark Knight
How to make a colourful Lego-inspired DIY clock:
 Step 1
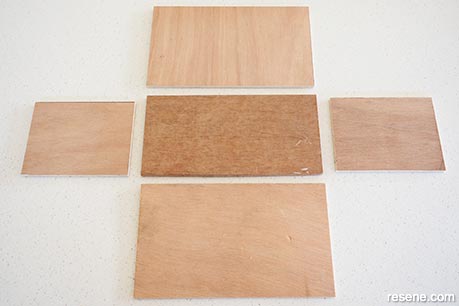
Fleur used some scrap untreated plywood for this project. Her scrap wood ranged in thickness from 4mm to 7mm. It doesn’t matter what thickness you use, but just make sure that the overall final dimensions are correct. Start by cutting out the five pieces to make the Lego-style brick. Fleur made her brick to be in proportion to a real Lego 1 x 2 brick, so the final size of the brick is 20cm long by 10cm wide by 12.5cm tall. Cut two sides, a front and a back and a top. Make sure you make allowances for the thickness of your wood. Use sandpaper to sand any rough edges smooth.
 Step 2
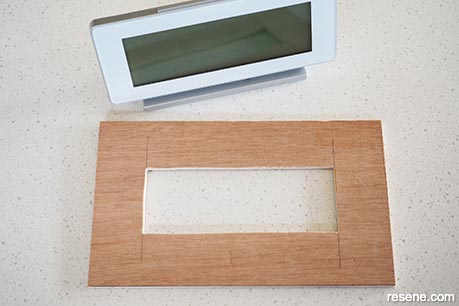
Measure the size of the clock display and transfer this measurement on to the front piece of wood. Drill a hole and then use a jig saw to cut out a rectangular hole in the front for the clock display to show through. Sand any rough bits smooth.
 Step 3
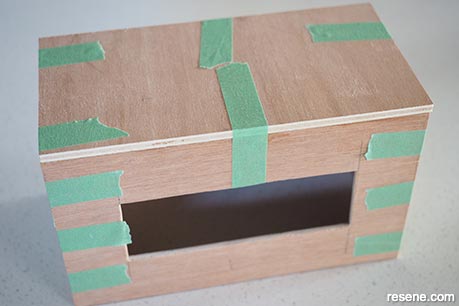
Glue all your wood together with strong wood glue. Fleur used some tape to hold it all together while the glue dried.
 Step 4
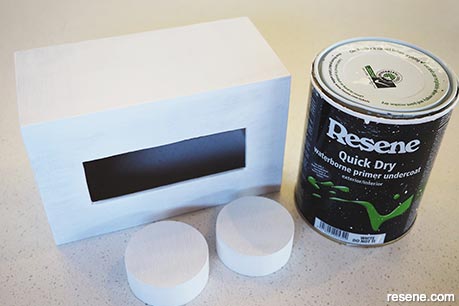
Once the glue is dry, remove the tape and sand the box to make all the edges flush and to remove any glue overrun. Paint on one coat of Resene Quick Dry, and once this is dry, give it a light sand. Wipe away the dust with a cloth. While the primer is drying, use a compass to draw two circles on to 2.5cm thick MDF. Make the circles 6.25cm in diameter. Cut these out with a band saw or jig saw and sand them smooth. Prime them with Resene Quick Dry and once that is dry, give them a light sand.
 Step 5
Paint the box and circles in Resene Flash Point. Apply two coats, allowing the first to dry before applying the second coat. Use wood glue to glue the two circles to the top of the brick/box. Hot glue the clock into place.
Top tip: Add to the lego theme by creating a photo frame using the same technique but replacing the clock with a photo frame and your children’s favourite photos. Use a different favourite common Lego colour to keep on theme – try Resene Spotlight, Resene Wet N Wild or Resene Japanese Laurel.
Styling and images by Fleur Thorpe. May 2022.
Habitat bright ideas
Need to add colour, pattern or a little creativity to your place? Check out these easy step by step DIY project ideas created in collaboration with Fleur Thorpe. We hope you enjoy making and painting these bright ideas and bringing colour to your home inside or out.
![]() Get inspired ! Subscribe
Get inspired ! Subscribe ![]() Get saving ! Apply for a DIY card
Get saving ! Apply for a DIY card
![]()
Can't find what you're looking for? Ask us!
Company profile | Terms | Privacy policy | Quality and environmental policy | Health and safety policy
Colours shown on this website are a representation only. Please refer to the actual paint or product sample. Resene colour charts, testpots and samples are available for ordering online. See measurements/conversions for more details on how electronic colour values are achieved.
What's new | Specifiers | Painters | DIYers | Artists | Kids | Sitemap | Home | TOP ⇧


